Rediscover Your Garden Joy This Season

Gardening is one of those timeless activities that brings peace, satisfaction, and a sense of accomplishment. Yet, it’s easy to lose sight of the joy it once brought, especially if you’ve faced setbacks or busy routines. If your connection with your garden feels distant or lost, it’s time to rediscover that spark. Whether you’re a seasoned gardener or new to the practice, here are a few simple steps to rediscover your garden joy.

Upclose view of a vegetable garden with JOY spelled out on rocks

1. Start Small and Set Realistic Goals to Rediscover Your Garden Joy

If gardening has felt overwhelming lately, it’s time to simplify. Start with a small project or area, such as a few pots or a raised bed. Break down your gardening tasks into manageable steps. Planting just a handful of flowers, herbs, or vegetables will give you a sense of achievement without feeling like a burden. Setting small, realistic goals can help you reconnect with the joy of watching things grow without the pressure.

2. Experiment with New Plants 

One of the most exciting aspects of gardening is discovering new plants and watching them thrive. If you’ve been sticking to the same plants year after year, challenge yourself to try something new. Maybe you’ve always wanted to grow a fragrant herb garden or a colorful wildflower patch. Experimenting with new plants can bring fresh excitement and remind you of the wonder of gardening. Explore different textures, colors, and even types of plants that you’ve never tried before.

3. Focus on the Senses to Rediscover Your Garden Joy
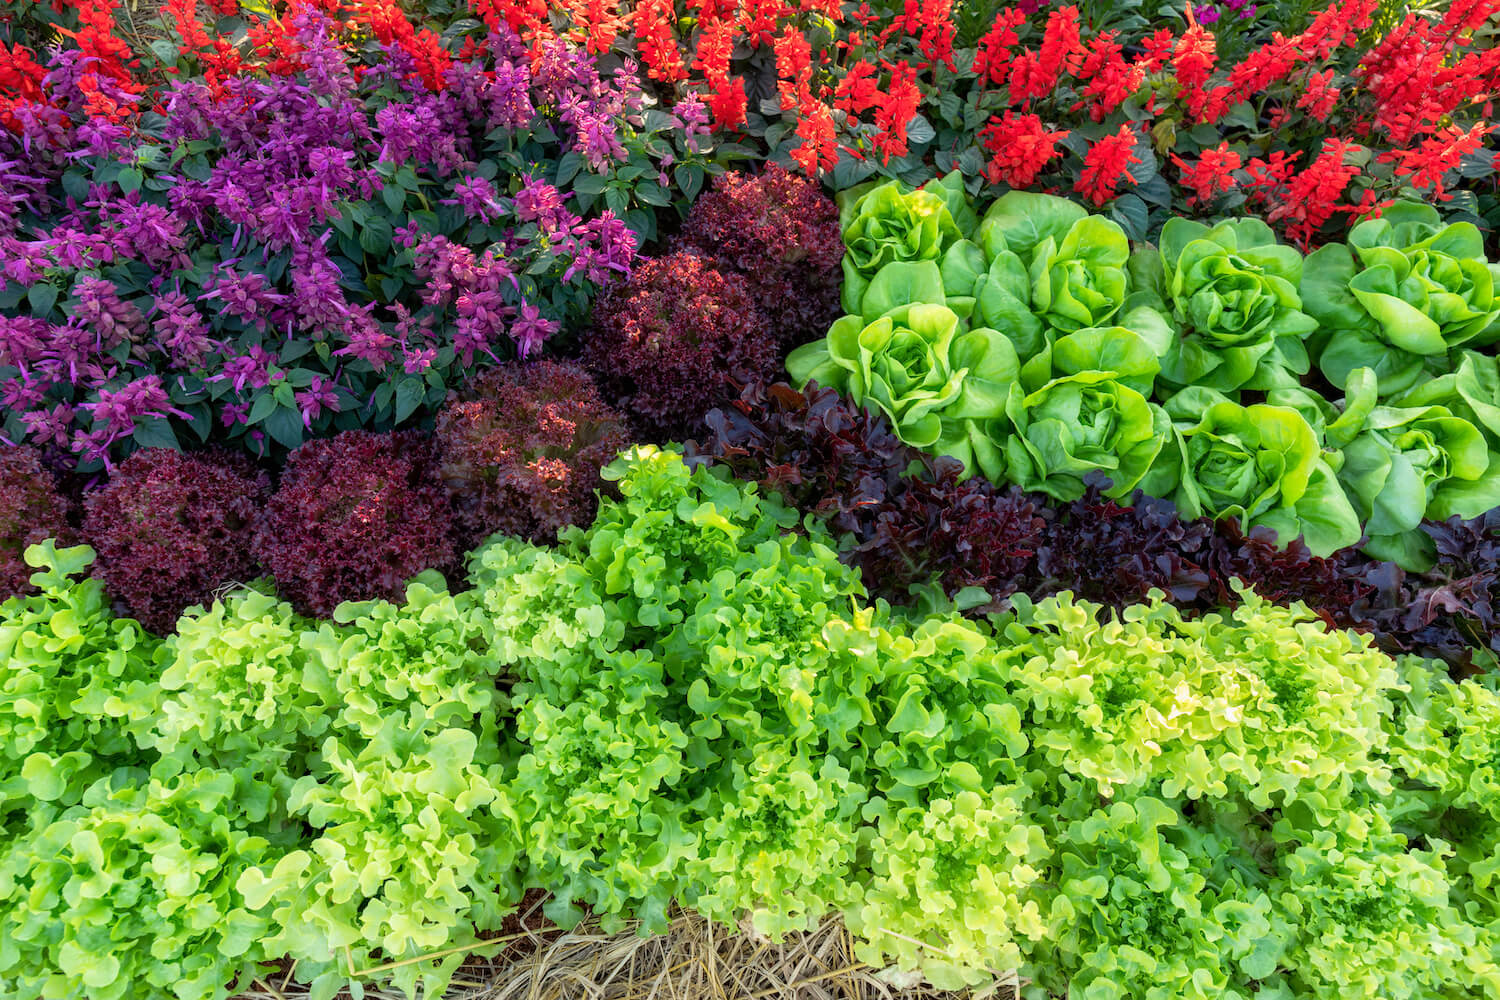
Upclose view of a vegetable garden with JOY spelled out on rocks

Gardening is a full-sensory experience. When you reconnect with your garden, focus not only on how it looks but also on what it feels like, smells like, and sounds like. Take time to notice the rustling of leaves, the scent of freshly cut grass, or the soft soil between your fingers. Engaging your senses in this way allows you to appreciate your garden on a deeper level and brings you back to the simple joys of spending time outdoors.

4. Incorporate a Relaxation Area

Your garden isn’t just for planting—it’s also a space for relaxation. If you haven’t already, create a peaceful corner in your garden where you can sit, unwind, and simply enjoy the surroundings. A bench under a tree or a hammock between two posts can serve as the perfect spot to take a break and reflect. This addition to your garden creates a space that invites you to enjoy the process and the present moment rather than just focusing on the tasks.

5. Share Your Passion to Rediscover Your Garden Joy

Gardening is more enjoyable when shared. Invite a friend or family member to join you in the garden, whether it’s for a planting session or just to appreciate the beauty you’ve created. Sharing your space can reignite your passion and remind you of the joy gardening can bring to others. 

Rediscovering your garden joy doesn’t require a complete overhaul or drastic changes. By starting small, trying new plants, engaging your senses, creating a relaxation space, and sharing the experience with others, you can rekindle the spark that gardening once brought. Whether you’re planting your first flower or redesigning your whole garden, the joy is in the process and the moments you spend connecting with nature. So, take a deep breath, step outside, and rediscover the beauty of your garden today.

Let us know in the comments what brings you JOY in your garden and how you reconnect!

Your #1 Lesson to Growing Food Learned By Helping Thousands of People Grow Food

Gardening isn’t just about putting seeds in the ground. It’s about understanding the unique challenges your plants face and helping them thrive despite those obstacles. You might think your garden struggles are insurmountable. But after helping thousands of people around the world grow food, there’s one lesson that stands out. Your #1 Lesson to growing food is that plants want to grow, and with the right approach, you can help them do just that. Here’s how you can overcome common gardening challenges and nurture a thriving garden.

Would you rather watch than read

‘Your #1 Lesson to Growing Food’?

Watch the video at the bottom of this post instead!


Your #1 Lesson to Growing Food Mindset #1 – Plants WANT to Grow… and Will Almost ANYWHERE!

Your #1 Lesson to Growing Food from teaching thousands of people around the globe - Plants want to grow in cityscape

Plants are simple at their core. They need water, light, nutrients, and space to grow. But the challenge comes when those needs aren’t being met in the way they should. Are you struggling with extreme weather conditions, hard soil, or poor plant growth? Your first step is to think like a plant. What does it need to survive in your environment? If your soil is too dry or hard, amend it with organic matter. If it’s too cold, try using row covers or greenhouses. Every challenge can be solved by understanding the specific needs of your plants.

Your #1 Lesson to Growing Food Mindset #2 – Patience is Key

When it comes to growing food, the best advice is to start small and be patient. You might feel tempted to rush the process or jump into complex solutions. But real success comes from baby steps. If a plant isn’t thriving, it’s often a sign that it needs just a little more care or attention. Don’t be afraid to experiment. You can tweak your approach as you learn more about what works. Over time, you’ll build a deeper understanding of your plants and their needs.

Your #1 Lesson to growing food – Commitment to Problem Solving

Your #1 Lesson to Growing Food from teaching thousands of people around the globe - Light bulb

Gardening is all about figuring things out. Sometimes, the answers don’t come quickly, and it may seem like the challenges are endless. However, commitment to solving those problems is the key to success. Every grower, no matter where they are, faces setbacks. But those who keep working, learning, and adapting are the ones who ultimately succeed. As you face challenges, remind yourself that persistence is part of the process. The solution is often just around the corner.

Your #1 Lesson to Growing Food Mindset #3 – Tap Into Gardening Wisdom

For generations, gardeners have passed down wisdom about how to grow food in all kinds of conditions. You don’t need to reinvent the wheel. There are countless resources available to help you solve common gardening problems. Talk to other gardeners, read books, and research online. Gardening is a shared experience, and learning from others can make a huge difference. You might discover a solution you never thought of.

Your #1 Lesson to Growing Food Mindset #4 – Keep a Positive, Open Mind

Sometimes, gardening can feel like a constant battle. But remember, your plants want to grow. They just need you to help them along the way. Approach gardening with a mindset of exploration. Stay open to new ideas and approaches. The challenges you face are opportunities for growth—for you and your plants.

Your #1 lesson to growing food learned from helping thousands of people grow food is simple: plants want to grow, and with a little patience and problem-solving, you can help them succeed. By thinking like a plant, staying committed to the process, and learning from others, you’ll overcome any gardening challenge. Keep pushing forward, and your garden will thrive.

Would you rather watch than read Your #1 Lesson to Growing Food?

Watch the video below instead!

3 Tips to Maximize Harvests & Simplify Your Garden Routine

If your garden ever feels chaotic or overwhelming, you’re not alone. Between planting, managing pests, and trying to stay on top of every season’s needs, it can easily get out of control. The key to smooth gardening is a solid plan. Imagine knowing exactly what to plant, where to plant it, and when to plant it—without all the guessing and stress. By organizing ahead of time, you can enjoy the growing season with confidence. Let’s dive into how you can maximize your harvests and simplify your garden routine.

If you’re a dedicated grower and you want to master crop planning we have a 3 in 1 course bundle that shows you how to grow hundreds of dollars of produce in the space the size of an SUV! To get that, CLICK HERE.

1. Be Ready with Materials Before the Season Starts

Getting your materials together before the season kicks off is a game changer. Whether it’s compost, soil amendments, planting beds, or seeds, have everything on hand so you’re ready when the season begins. This means you won’t be running around scrambling to find what you need when the planting window opens.

Why does this matter? Timing is everything. For instance, peas mature in 50 days, but they stop growing when the temperature hits 75°F. To get the best harvest, you need to plant them early enough in the season, such as the beginning of April if you live in a cooler climate like New York. The more prepared you are ahead of time, the smoother your growing season will be.

2. Plan Your Planting for Maximum Harvest

Would you rather watch than read

‘3 Tips to Maximize Harvests & Simplify Your Garden Routine’?

Watch the video at the bottom of this post instead!

3 Tips to Maximize Harvests & Simplify Your Garden Routine - Vegetable Basket

One of the smartest ways to get more out of your garden is by planting to maximize every space. You can do this by calculating how much time it takes for plants to mature and planning accordingly. For example, arugula matures in just 42 days, which means you can grow it multiple times in a season. By timing it right, you could harvest arugula up to four times!

Fill every available space in your garden, even smaller areas, with quick-growing crops. This approach ensures that your garden produces as much as possible throughout the season, giving you a constant harvest.

3. Save Money with Bulk Seed Purchases

Buying seeds in bulk is a great way to save money while planning for multiple seasons. When you know exactly how many seeds you need, buying in bulk helps lower the cost per pound. Plus, you can purchase extra seeds for next season, so you’re always ahead of the game.

This strategy is especially useful for crops you plan to grow every season, like tomatoes or lettuce. It’s a cost-effective way to ensure you have everything you need for your garden without constantly buying smaller packets each year.

3 Tips to Maximize Harvests & Simplify Your Garden Routine - Bulk Seeds

The growing season doesn’t have to feel overwhelming or chaotic. With a bit of preparation and smart planning, you can maximize your harvests while simplifying your gardening routine. By being ready with materials ahead of time, planning your planting for maximum yield, and saving money with bulk seed purchases, you’ll enjoy a more efficient and productive garden. Start now, and watch how much smoother the entire gardening process becomes!

Would you rather watch than read?

Watch the video below instead!

This online course bundle gives you everything you need to succeed—with Done-for-You templates that you can every year.

credit card icons

For your security, all orders are processed on a secured server.
Your purchase is protected by our 1 year money back guarantee.

What 6″ of Empty Garden Space Costs You

Your garden is full of potential, but even six inches of unused space can make a surprising difference in your harvest. Discover what 6″ of empty garden space costs you.

Small Space, Big Impact

Six inches of garden space might seem insignificant, but it can yield an impressive amount of fresh produce. Imagine turning that small patch into a pound of carrots, five heads of lettuce, or two pounds of radishes. That’s food on your plate and money saved at the store. Each inch in your garden has the power to nourish you and your family.

Would you rather watch than read

‘What 6″ Empty Garden Space Costs’?

Watch the video at the bottom of this post instead!

What 6" of Garden Space Costs - Leafy Veggies with Roots

Fight the Weeds, Grow More Food

Empty spaces in your garden don’t stay empty for long. Weeds will quickly take over, stealing nutrients and sunlight from your crops. These invaders signal an opportunity—a chance to grow more food instead. By filling those gaps, you’ll reduce weeds and boost your harvest. Every inch counts when it comes to maximizing your garden’s output.

Calculate Your Garden’s Potential

Look at your garden and count the six-inch gaps. How much could you grow in that space? Six pounds of pac choi? Two and a half pounds of chard? The possibilities are endless. Start planning your crops today to unlock your garden’s full potential. Each little section adds up to a more abundant harvest.

Make a Crop Plan

What 6" of empty garden space costs -  Choose Your Crops

Planning is key to success. Map out your garden and identify the empty spots. Think about what you can grow now and what can follow after harvesting. This rotation keeps your garden productive all season long. A crop plan ensures every inch works for you, not against you.

Stay on Schedule

Mark planting, transplanting, and harvesting dates on your calendar. Weekly reminders keep you on track, so you never miss a step. Tending your garden regularly ensures those six-inch spaces stay productive. The time you invest now pays off with a harvest you’ll enjoy for months.

Every six inches of garden space has value. Whether it’s carrots, lettuce, or herbs, those tiny gaps can translate into big rewards. By planning, planting, and maintaining your garden, you’ll reduce weeds and enjoy a more abundant harvest. Don’t let even a single inch go to waste—your plate and wallet will thank you!

Would you rather watch than read?

Watch the video below instead!

If you’re looking for the Register button mentioned at the end of the video… here’s that link: https://growyourownvegetables.org/cropplan/

Escape Overwhelm in Your Garden… Here’s How!

Gardening should bring joy, not stress. If your garden feels like more work than reward, it’s time to shift your mindset. By focusing on one step at a time and setting aside what’s not urgent, you can create a space that’s manageable and enjoyable.

Would you rather watch than read? Watch the video at the bottom of this post instead!

Start with a List

Begin by listing everything you think you need to do in your garden. Everything from redesigning garden beds to planting new varieties. All your tasks go on this list.

Then, to free yourself to focus on what needs done today, title that page, “what I’m not doing right now” list. This approach clears mental clutter and keeps you from feeling overwhelmed. Don’t worry, the list will be there waiting for you for when YOU are ready. You can revisit these items when you’re ready—no guilt, no rush.

The “What I’m Not Doing Right Now” List

 The “what I’m not doing right now” list is a game-changer. Often, a to-do list ends up shackling us, making us feel unaccomplished and overburdened. Your to-do list is supposed to serve you, free you from feeling like you have to remember everything. So titling this list, ‘what you’re not doing right now’ is a good reminder that you are not beholden to your list… the list is there when you are ready for it. 

Focus on One Task at a Time

Then you’ll take a blank piece of paper and title this “to-do” list. You’ll move just one task to that page at a time. This is ONLY for immediate task—focus on just one at a time. Everything else goes on the “what I’m not doing right now” list to revisit later.

Overwhelm often comes from trying to tackle too much at once. Pick one task from your “to-do” list that will make the biggest impact. For example, start with watering your garden. Keeping plants hydrated is essential and sets the foundation for success. Once that’s handled, move on to another priority like planting or weeding—one step at a time.

Escape Overwhelm in Your Garden - Overwhelm

Keep the Basics in Mind

When you’re unsure where to start, stick to the basics. Water your garden, ensure plants get enough sunlight, and focus on your ultimate goal—getting food on your table. Let this simple priority guide your actions. Don’t worry about perfection; thriving plants come from consistent, basic care.

Create Relaxation Zones

Even as you tackle your “to-do” list, remember to enjoy your garden. Dedicate areas for relaxation, like a bench under a tree or a small patio space. These zones remind you to pause and savor your progress. They’re a reward for your hard work and a reminder that gardening is about more than chores.


Escape Overwhelm in Your Garden - Garden Bench

Keep It Manageable

Your garden doesn’t have to be perfect, and neither does your routine. Focus on what brings you joy and tackle tasks one step at a time. By maintaining a “to-do” list and a “what I’m not doing right now” list, you’ll stay organized and reduce stress. This mindset can transform your gardening—and your life—into something far more fulfilling.

Simplify your approach, focus on small wins, and let go of the rest for now. Your garden will thrive—and so will you. 

Want to learn more strategies and tips to reduce overwhelm? 


Create Your 3 Garden Journal Spaces

Download the 3 Journal Modes eguide so you can create more garden abundance!

Would you rather watch than read? Watch the video below instead!

In the comments below, let us know what makes you feel overwhelmed. What kinds of things in your garden are hard to put aside?


Plan for Short & Long Term Garden Success

As the growing season winds down, your garden can still thrive. Instead of leaving your soil bare or wondering what to plant next, you can enjoy a bountiful harvest and enrich your soil at the same time. Here’s how to plan for Short & Long Term Garden Success!.

Would you rather watch than read

‘Plan for Short & Long Term Garden Success’?

Watch the video at the bottom of this post instead!

Why Choose Between Fall Crops and Cover Crops?

Why settle for one when you can do both? Fall crops like arugula, radishes, and kale keep your harvest going as the temperature drops. At the same time, cover crops such as crimson clover, hairy vetch, or winter rye protect and nourish your soil. By combining these strategies, you create a garden that works hard for you year-round.

Maximize Your Soil’s Health for Garden Success

'Planning for Short & Long Term Garden Success'? - Row being Planted

Cover crops play a crucial role in maintaining soil fertility. As they grow, their roots aerate the soil, preventing compaction and reducing erosion. Legumes like Austrian winter peas add nitrogen to the soil, while grasses such as oats improve organic matter. Chop and drop these crops at the end of the season, and they transform into nutrient-rich mulch, ready for your next planting.

Start with Undercropping for Garden Success

Undercropping is a simple way to prepare your garden for fall. Scatter cover crop seeds beneath your mature plants before they’re finished. As the season ends, cut the mature plants at the base, leaving the undercrop to thrive. For example, plant crimson clover beneath tall crops like leeks or fava beans. By the time the frost arrives, your cover crop will already be established.

Don’t Overthink Planting

'Planning for Short & Long Term Garden Success'? - Crimson Clover Field

Planting cover crops is easy and forgiving. Sprinkle seeds evenly over your garden at about one ounce per 50 square feet. Water them well and keep the soil moist to encourage germination. There’s no need for precision—just spread the seeds, and let nature do the rest.

Enjoy the Best of Both Worlds

Combining fall crops with cover crops gives you a garden that produces food while preparing for the next growing season. You’ll enjoy fresh, cool-weather vegetables and improve your soil’s structure and fertility at the same time. This dual approach means less work for you in the long run and a healthier garden year after year.

Maximizing your garden’s potential doesn’t have to be an either-or decision. With fall crops and cover crops working together, you’ll harvest more, enrich your soil, and create a sustainable garden system. Ready to give it a try? Your garden—and its soil—will thank you.

Would you rather watch than read

‘Plan for Short & Long Term Garden Success’?

Watch the video below instead!

One Crop Rotation Rule to Prevent Diseases in Your Garden

Plan your plants to prevent disease in your garden!

When you’re thinking about what to plant where this year, you should be thinking bigger picture—what crop rotations each year will help you prevent the kinds of diseases that wipe out all your hard work and your harvest.

By following a simple rotation rule, you can avoid costly mistakes, protect your harvest, and keep your garden thriving year after year.

Would you rather watch than read? Watch the video at the bottom of this post instead!

Why Crop Rotation Prevents Disease

Planting the same crop in the same spot every year invites trouble. Diseases like black rot (affecting cabbage, kale, and collards), late blight (a common tomato killer), and bacterial wilt (a threat to cucumbers) thrive when crops stay in one place. Rotating crops breaks the life cycle of these pathogens, reducing their impact on your garden.

Group Crops by Family

To effectively use crop rotation, start by grouping your crops into families. For example:

  • Brassicas: Cabbage, kale, collards
  • Nightshades: Tomatoes, peppers, eggplants
  • Cucurbits: Cucumbers, squash, melons

Rotating these families to different beds each year ensures that diseases don’t get a chance to establish a stronghold in your soil.

Shift Beds Annually

Once you’ve grouped your crops, make a plan to shift their location each year. For example, if you grow cabbage in one bed this year, plant cucumbers or another crop family in that bed next year. This movement disrupts the disease cycle and keeps your plants healthier.

Address Inevitable Pests

While crop rotation significantly reduces disease pressure, pests can still pop up. Rotating crops makes it harder for pests to locate their preferred plants. For example, if cucumber beetles find your cucumbers one year, moving cucumbers to another bed the next year forces them to search for their food elsewhere, giving your plants a break.

By rotating crops and shifting beds, you can lower these threats and enjoy a productive, disease-free garden. Take the time to plan your crop rotation now, and you’ll be rewarded with healthier plants and bigger harvests.

Would you rather watch than read? Watch the video below instead!

If you would like more in-depth instruction on planning your garden for success, check out our Crop Planning course. It’s a sure fire way to feel more in control of your garden every time you plant.

What crops do you like to rotate? Let us know below!

Getting Started Growing Your Own Vegetable and Herb Seedlings

Seedlings are the baby plants you see at the nurseries, ready to be transplanted into your garden. But you might want to grow your own instead. While there are many benefits of starting your own vegetable and herb plants from seeds, there is one BIG reason why you might consider purchasing instead. Here are the most important considerations for growing seedlings at home. 

Benefits to growing your own:

  1. You know exactly how the seedlings were grown. Ensure your plants are grown organically without any toxic chemicals entering your garden. When purchasing, ask whether plants have been treated. 
  2. You ensure your plants immunity is high for a healthy life. Temperatures and conditions are important to baby plants, and stress at a young age can cause transplant shock or a weak plant that doesn’t yield well. Sometimes you bring home a seedling, plant it, and it dies. And you’re not sure if it’s something you did. But it could just be a plant that wasn’t cared for properly.
  3. You have complete control of when you put plants in the ground. When purchasing transplants, you are relying on what’s available at the stores. And what you want is not always there when you need it. Growing your own means you can plan ahead for your most abundant harvest.
  4. You have access to hundreds of varieties of vegetables. There are so many varieties of mustard greens and tomatoes on the planet that nobody could even tell you how many there are. And that’s true of most vegetables. Choose exciting varieties for flavor, yield,  and what grows well in your climate. 
  5. You save money. Once you get the hang of growing HEALTHY plants and you have all the supplies, you will save money. However, the first few years, planting your own can actually be more expensive than buying transplants. This is the one BIG reason you may want to purchase instead.

Three garden supplies essential to growing your own seedlings

You’ll need 1) growing medium (not soil), 2) containers to put it in, and 3) grow lamps if you’re growing indoors. We’ll focus on containers in this article. But real quick, our favorite growing medium is Fox Farm Ocean Forest Potting Mix. It’s got everything your plants need in one bag, from earthworm castings, bat guano, sea-going fish & crab meal to forest humus and moss. This mix will not disappoint!   Click here to get it on Amazon. And here is a bulk order option

This article is too short to include recipes for making your own mix. A couple key ingredients to include are perlite, vermiculite, peat moss or Canna Coconut Coir and Wiggle Worm – Worm Castings. For small gardens, choose the 4.5-pound size. For larger gardens, choose the bulk 30-pound option.

This is not a complete list, just some of our favorites to get you started.

Reusable Containers for Starting Vegetable and Herb Seeds


Generally, plastic trays are flimsy and end up in the landfill after just one or two uses. However, one farm is changing all that and helping to redefine our relationship to the Earth. Bootstrap Farmer offers durable trays with a one-year warranty against warping and breakage… that’s amazing! Clean trays between use to prevent disease spread.

These are the best, longest-lasting trays on the market. And they have different cell sizes available. Get cells for smaller varieties like lettuces here and get larger six cells for your larger transplants like tomatoes and cucumbers here.

Containers You Plant Right in the Ground

Avoiding plastic altogether? Consider Fertilpots over at Arbico Organics, which compost right into your soil. Plant the whole thing in your garden and avoid any transplant shock from handling the plant. Unlike many similar compostable products, they are OMRI-listed meaning the ingredients have been tracked as organic. Fertilpots are breathable and help prevent roots from getting root-bound, too. However, the downside is that you have to keep buying more.

“Soil Blocking” Eliminates the Need for Containers

Soil blocking is a process where you press your growing medium together into squares that hold together without the need for containers. Once you have the right equipment for this process, you never have to buy containers ever again. However, you do have a higher initial investment to get started.

There are benefits to this method: no cleaning trays, conserving growing medium, and providing optimal root health. How to soil block effectively is a topic of another post. NOTE: You’ll need to mix your own special growing medium (not one that you can buy at a big-box store), and a bit of time to get used to the process. 

Soil blockers are for anyone who wants to get away from plastic, has a little extra time and money, wants the healthiest seedlings and plans to garden long-term. 

20-Cell Soil Blockers come in a handheld and stand-up  versions. The stand-up soil blocker is much easier on your wrists, shoulders and back. 4” Soil Blockers are the largest blocker available and are perfect for your larger transplants like tomatoes, gourds, cucumbers, eggplant, etc.

How do you make your garden decisions?

Ultimately, there are many garden choices you will make. Some questions to consider: What do you really have time for? What feels like the best environmental choice for you? And what amount of investment feels good right now? Whatever suits you and your lifestyle is the right choice for you. And that goes for making decisions about seed starting at home, too.  

Check out our Seeds Micro Course!

In this course, you’ll find resources for buying seeds that reflect your values, starting successful seedlings, and saving seeds–make gardening everything you need and want it to be!

Seeds Micro Course Graphic

Not Ready to Grow Yet?

Check out our Free Guide on Types of Seeds

In this guide, you’ll learn

Types of Seed Quick Guide TINY
NOTE:  This article contains affiliate links and Grow Your Own Vegetables, LLC may be compensated when you click and purchase through the links above. By purchasing through these links, you’re supporting our mission to help green the planet and create food stable communities across the globe. We only recommend products we LOVE and that help growers on their quest for a fresh food lifestyle.

Delicious Microgreens Recipes!

Have you ever considered how a tiny garnish can transform your meals? Microgreens are not only bursting with nutrients; Plus, they’re also a delightful way to enhance the taste and visual appeal of your dishes. Let’s delve into some tantalizing delicious microgreens recipes!

Microgreens 101: A Charcuterie Adventure

Delicious Microgreens Recipes! Charcuterie

Imagine a canvas of flavors and textures awaiting your creativity. A charcuterie board with microgreens lets you play with taste in ways you might not have considered. Firstly, lay out an array of sweet fruits and jams. Then add tangy pickles and citrus. Be sure to include salty cheeses and nuts.

Pair your charcuterie board with a bitter or spicy microgreen to balance. Specifically, microgreen varieties like kale, purple kohlrabi, mustard, and radish make superb choices. Dive in and let each bite be an exploration of flavors!

Perfect Pairings: Roasted Soup and Microgreens

Delicious Microgreens Recipes! Soup Ingredients

Who knew that the secret to elevating a warm bowl of roasted butternut squash and poblano pepper soup could be a handful of microgreens? The answer lies in their crisp nature, contrasting the soup’s velvety texture. Drizzle olive oil and squeeze lime for an extra layer of flavor. You’ll be surprised at how something so simple can make such a profound difference to your taste buds.

Summer in a Bowl: Melon and Sweet Pepper Salad

Delicious Microgreens Recipes! Melon and Sweet Pepper Salad with Microgreens and Hazelnuts

As the sun blesses us with its warmth, there’s no better way to celebrate than with a refreshing melon and sweet pepper salad. The microgreens add a crisp, refreshing touch that perfectly complements the sweetness of melon and the subtle savoriness of hazelnuts. It’s a dance of flavors and textures that will have you craving for more with every forkful.

Creative Combos: Your Microgreens Journey

You’re now equipped with a few ideas to get started; moreover, the true joy of microgreens lies in their versatility. Don’t hesitate to experiment; find your perfect combo for your delicious microgreen recipes. Add them to your sandwiches, pizzas, or even smoothies. The possibilities are endless and so are the health benefits.

Embracing microgreens in your cooking is not just about a trendy ingredient; indeed, it’s about discovering new dimensions of taste and nutrition in your daily meals. Whether you’re a seasoned chef or a curious foodie, microgreens have something to offer. So go ahead, sprinkle a little green on your next dish and watch it come alive. Bon Appétit!

Want to grow your own microgreens at home?

It’s Easy!

Get Your Complimentary Guide to Growing 6 Easy-to-Grow Microgreen Varieties

Guide to 6 Easy to Grow Microgeens

Mastering Microgreen Planting Techniques

Unlike your typical garden vegetables, microgreens are planted closer together and therefore require a slightly different planting approach. These nutritious and delicious mini-plants can easily give you high-yield harvests, even in the smallest of spaces. However, if you don’t plant them correctly, you risk losing entire trays to mold or bacteria. You can avoid such disappointment by learning the right way to plant each variety. Start mastering microgreen planting techniques now.

Large Seed Microgreen Planting Techniques

Strategies for Planting - Different Micros

When you’re working with larger seeds like tetragonia or sunflower, beware of mold. These seeds easily touch one another, and their discarded husks are a potential breeding ground for bad bacteria. To combat this, you need a deft touch. Start by spreading the seeds evenly across your growing tray. Then, sprinkle a light layer of substrate over the seeds. This simple step can significantly reduce the risk of mold and ensure your microgreens grow healthily.

Tiny Seeds: Sowing for Success

Smaller seeds, such as amaranth, will look more sparse in the tray making it easier to accidentally over seed the tray. Covering these seeds can spell doom for your harvest as these tiny sprouts struggle to break through. To avoid this, gently press the substrate. Then, sow your small seed microgreen varieties directly on top of the substrate. Gently press them down without burying them, allowing their delicate roots to anchor. By resisting the urge to cover them, you provide the perfect conditions for their rapid growth.

Needle-Like Seeds: The Pinch Perfect Method

Microgreens with seeds shaped like needles, like marigold gem, need precision planting. Scatter the seeds as evenly as possible into non-pressed substrate. Next, lightly pinch the seeds into the soil to prevent clustering and provide them with enough substrate to root into without being entirely covered. This method ensures that each seed has adequate space and resources to grow into a healthy, robust microgreen.

By understanding the specific needs of each type of microgreen seed, you can maximize your harvest and enjoy these nutrient powerhouses in your salads, sandwiches, and garnishes. Remember, successful microgreen planting isn’t just about sowing seeds; it’s about sowing them right.

Start Mastering Your Microgreen Planting Techniques

Learn seed amounts, get growing notes, and discover the days to germination, days under the lights, and days to harvest

Microgreen Variety Chart Opt In TINY

What’s you’re favorite microgreen variety?