Spirit Gardening: Embrace Wonder in Your Garden

When you step into your garden, do you feel a sense of peace and excitement or do you feel stress and overwhelm? Gardening isn’t just about growing food—it’s a journey, a process of discovery, and one of the most important stages in spirit gardening: embrace wonder. This stage is all about embracing your childlike curiosity and allowing yourself to ask questions. It’s the moment when you realize how much there is to learn, explore, and connect with. In this blog, we’ll dive into why the stage of wonder is essential to your gardening practice and how you can cultivate it to deepen your connection with the land.

Would you rather watch than read

‘Spirit Gardening Stage 1: Embrace Wonder?’

Watch the video at the bottom of this post instead!

Spirit Gardening: Embrace Wonder – The Magic of Asking Questions

Wonder begins with curiosity. As a gardener, you’ve likely found yourself asking questions like: “How does this plant grow?” “What can I do with these herbs?” or “How can I make my garden more vibrant?” Asking questions is the foundation of learning and growing—both for your garden and for yourself. The beauty of the wonder stage is that there’s no wrong question. Every inquiry sparks new possibilities and opens doors to deeper understanding. By embracing the magic of curiosity, you allow yourself to explore new techniques, discover hidden gardening secrets, and truly appreciate the process.

Spirit Gardening: Embrace Wonder – See Your Garden Through New Eyes

Spirit Gardening: Embrace Wonder - Light pink flowers dapple a mystical blue and teal nature path


When you embrace wonder, you stop seeing your garden as just a plot of land and start seeing it as a living, breathing entity full of potential. Wonder allows you to look at your plants, herbs, and vegetables not just as food, but as unique beings that have something to teach you. You might find yourself marveling at the way a seed transforms into a plant or how the smell of fresh herbs can instantly lift your spirits. Every moment in the garden becomes an opportunity to deepen your connection with nature, encouraging a sense of awe that enhances your gardening experience.

The Spirit of Exploration

In the stage of wonder, the garden becomes your playground. It’s not about knowing all the answers but about exploring, experimenting, and making discoveries along the way. Maybe you try growing a new herb or experiment with a preservation technique you’ve never used before. Perhaps you create a unique recipe using ingredients straight from your garden. Whatever it is, wonder invites you to be adventurous. It’s about finding joy in the journey and knowing that each season brings something new to learn and explore. The spirit of wonder keeps you engaged and excited, even when the process feels challenging.

Spirit Gardening: Embrace Wonder – Wonder is the Gateway to Growth

Spirti Gardening: Embrace Wonder - Garden wrought iron gate with pink flowering plants on either side the whole image bathed in shimmering light

Wonder isn’t just about asking questions and being curious—it’s also about growth. The more questions you ask, the more you’ll discover. The more you explore, the more you’ll find new ways to nurture your garden and yourself. Wonder leads to deeper knowledge and a stronger connection to the land. It encourages you to step out of your comfort zone, try new things, and trust the process. As you continue to ask questions, make discoveries, and embrace the unknown, you’ll find yourself growing alongside your garden.

In spirit gardening, wonder is the first and most important stage of the journey. It’s about seeing your garden with fresh eyes, embracing curiosity, and exploring the endless possibilities it offers. By allowing yourself to ask questions, experiment, and be open to the unknown, you invite deeper connection and growth into your gardening practice. So, the next time you step into your garden, let wonder guide you. Ask yourself what you can learn today, and let that curiosity fuel your gardening adventure.

Would you rather watch than read

Spirit Gardening Stage 1: Embrace Wonder?’

Watch the video below instead!


Enjoying Stacey’s Spirit Gardening Series? Share your ‘AhHa’ moments with us!

The Benefits of Fermentation: A Healthier Way to Preserve

Gut health is a growing concern, with many facing digestive issues and chronic conditions due to an imbalanced gut microbiome. Much like losing a garden harvest to disease, poor gut health can have long-term effects on overall well-being. Fermented foods offer a natural solution to support gut health, improve nutrient absorption, and enhance wellness. Let’s explore the benefits of fermentation!

The Impact of Poor Gut Health

Poor gut health can lead to a host of issues, including poor digestion, weakened immunity, and even mental health concerns like anxiety and depression. Just like a neglected plant disease can ruin your garden, an imbalanced gut can negatively affect your physical and mental well-being. Without proper attention, these issues can worsen over time, making it harder to restore balance.

Fermented Foods: A Natural Solution

Fermented Food

Fermented foods are a powerful tool to improve gut health. During fermentation, beneficial probiotics are produced that help restore balance to the gut microbiome. Foods like kimchi, sauerkraut, miso, and kefir provide the bacteria necessary to support digestion and immunity. Additionally, fermentation increases the bioavailability of nutrients, meaning your body absorbs vitamins and minerals more efficiently.

Fermented foods offer a natural way to enhance your digestive system and improve nutrient absorption. This is especially important for getting the most out of the food you eat, even if you don’t always have access to the freshest, locally grown produce.

Get Started with Fermentation

Fermentation may seem daunting, but it’s easier than you think. We’ve created a helpful guide to get you started with fermenting at home. This guide walks you through the steps, providing tips and advice to ensure success without the trial and error. We’ve learned from our mistakes, so you don’t have to! Whether you’re preserving your garden harvest or just want to add more fermented foods to your diet, this guide will help you boost your gut health with confidence.

1/2 gallon colorful jars of ferments lined up - Fresh Food Journey

Fermentation is more than just a way to preserve food—it’s a powerful tool for improving your gut health and overall wellness. By incorporating fermented foods into your diet, you’ll support digestion, enhance nutrient absorption, and strengthen your immune system. Start today and check out our guide to take the first step toward better health!

🫙 Ready to take your fermentation to the next level? 🫙

If you loved learning about the powerful benefits of fermentation, you’ll definitely want to check out our Funky Fermentation Course. Inside, you’ll get step-by-step guidance, easy recipes, and expert tips to help you transform your garden harvest into gut-healthy, flavor-packed ferments your whole family will love.

Explore the Funky Fermentation Course and start turning your veggies into delicious, probiotic-rich creations today!

Comment below and share your funky fermentation stories!

10 Principles for a Successful Fresh Food Preservation System

Preserving your garden harvest is a rewarding way to enjoy fresh, nutritious food year-round. With the right techniques, you can enjoy your homegrown produce long after the growing season has ended. Whether you’re looking to prepare creative meals or want a healthy and efficient system for your pantry, these 10 principles will help you preserve your harvest and enjoy it all year long. Let’s dive into these 10 Principles for a Successful Fresh Food Preservation System!

Would you rather watch than read

‘10 Principles of a Successful Fresh Food Preservation System?’

Watch the video at the bottom of this post instead!

1. Proper Harvest Techniques for Maximum Storage Time

Garden Harvest_LG_Canva -10 Principles of a Successful Fresh Food Preservation System?

To get the most out of your garden, harvesting at the right time is key. Ensure you’re picking your produce at its peak for the longest possible shelf life. Each vegetable has its ideal harvesting window, and knowing when to pick will prevent spoilage and ensure you’re able to store your food effectively. Start by understanding your crops and when they’re ready for harvest.

2. Match Vegetable Harvest with Our Meal Plan

Planning your meals around what you’re harvesting ensures you’re using your produce efficiently. By aligning your garden’s bounty with a meal plan, you avoid excess food waste. Consider incorporating seasonal vegetables into your weekly meals, and make sure to preserve any extras you can’t consume immediately.

3. Creativity Comes From Having a System

A good preservation system opens the door to endless creativity in the kitchen. With a set routine for storing, preserving, and using your produce, you’ll have a variety of options at your fingertips. Having everything organized lets you experiment with different recipes and meal combinations. It’s easier to get creative when you know exactly what you have in stock!

4. Make Things Visible and Track Your Progress

Preserve Your Veggies Dehydrated Food - Garden Harvest -10 Principles of a Successful Fresh Food Preservation System?

To keep your pantry organized, visibility is key. Label your jars and storage containers, and keep an inventory of what you have. This simple step helps prevent forgetting what’s available and keeps you motivated to use your preserved food. Tracking your progress lets you see what you’ve achieved, making it easier to plan for the next harvest.

5. Batch Your Prep Time: Spend Less Time Each Week

One of the biggest time-savers is batching your prep work. Instead of preserving food every day, set aside specific times each week to focus on prep. This method helps you stay on top of your harvest while saving you time in the long run. You’ll be able to focus on other tasks while still ensuring your food is properly preserved.

6. Many Hands Make Light Work: Get Everyone Involved

The preservation process doesn’t have to be a solo endeavor. Get the whole family or your housemates involved! Whether it’s washing, chopping, or labeling, everyone can contribute to the process. The more hands on deck, the quicker and easier the task becomes. Plus, it’s a great way to teach others about the importance of food preservation.

7. Start Simple, Master One Thing, Then Try Another

When you’re just getting started, it’s best to begin with one preservation technique. Whether it’s canning, freezing, or drying, take time to master that method before moving on to others. As you become more comfortable with the process, you’ll feel more confident branching out and trying new preservation methods.

8. Choose Preservation Technologies Right for You

Different preservation methods work best for different needs. Consider your kitchen space, available equipment, and time constraints before selecting a preservation method. If you have the space, investing in a freezer might be ideal. Alternatively, canning or dehydrating could be a better choice if you’re looking for a more long-term solution.

9. Shop from Your Pantry: Use Preserved Food Creatively

Create Your Dream Pantry muradi-0b8NaL2CMaQ-unsplash  -10 Principles of a Successful Fresh Food Preservation System?

One of the best ways to utilize your preserved foods is to shop from your pantry. Challenge yourself to create meals using only what you’ve stored. Not only will this help you reduce food waste, but it will also encourage you to get creative with your meals and try new dishes.

10. Stock Your Kitchen with Staple Ingredients

Lastly, ensure that your kitchen is stocked with essential ingredients that complement your preserved foods. Things like grains, beans, and spices will allow you to create balanced meals using your preserved fruits and vegetables. Having these items on hand gives you more flexibility in your meal planning and ensures you always have something tasty to whip up.

By following these 10 principles, you can set yourself up for success in preserving your garden harvest and creating healthy, creative meals all year round. Each principle works together to build an efficient, enjoyable system. So, get started today! With the right plan in place, you’ll enjoy the fruits of your labor for months to come.

Here it is! The simple system for preserving the garden harvest. Creative meals, delicious recipes and easy techniques to ensure you have healthy food right in your pantry, year round… even when you don’t feel like cooking. These 10 principles will get you started right! And you can shortcut the whole process and simply copy my Harvest Into Meals system when you register for my Preserve the Harvest class… Register here: https://growyourownvegetables.org/preserve/


Would you rather watch than read

10 Principles of a Successful Fresh Food Preservation System?”

Watch the video below instead!

Cutting Boards for Fresh Food Safety

Food safety is crucial when preserving and storing food, and one often overlooked tool is the cutting board. Choosing the right board can help prevent bacterial contamination, especially when preparing fresh produce. Here’s a quick look at the best cutting boards for fresh food safety.

Carrot & Celery on a cutting board

Plastic, Glass, or Wood: Which Is Safer?

While plastic has long been considered the safest option, recent studies suggest glass is actually more bacteria-resistant. However, glass can be tough on knives and may cause food to slip. Wood offers the best balance of safety and practicality, with natural antibacterial properties that plastic and glass lack. Well-maintained hardwood cutting boards are less prone to contamination, making them an excellent choice for food safety.

Sterilizing and Caring for Your Wooden Cutting Board

Wooden boards are easy to clean and maintain. Simply rinse with warm water, sprinkle salt, rub with lemon, let sit for five minutes, and rinse again. This method avoids harsh chemicals while ensuring cleanliness.

Best Woods for Cutting Boards for Fresh Food Safety

Cutting Board (wood-rectangle)

Hardwoods like oak, mahogany, and maple are ideal. Maple, with a Janka hardness rating of 1450, is a solid choice, but higher ratings (2500+) offer the best durability and bacteria resistance. Crelicam Ebony, with a Janka rating of 3080, is an excellent option for a durable, antibacterial board.

Check out this amazing cutting board, the Stella Falone Reversible Cutting Board made of solid West African Crelicam Ebony Wood.

Affordable Hardwood Cutting Boards for Fresh Food Safety

Teardrop cutting board. Beautiful wood with red stripe across

For a more budget-friendly option, Purpleheart Wood (Janka rating 2520) is a great choice.

The Ziruma Teak and Purpleheart Wood Cheese Board is a stylish and practical option, cured with organic beeswax for extra protection.

The Downside of High-Hardness Wood Cutting Boards

Harder woods may dull knives faster, but regular sharpening will keep your knives in top shape. The added food safety benefits make the trade-off worthwhile.

A well-maintained hardwood cutting board offers the best food safety. Glass may prevent bacterial contamination, but it risks knife damage. Wood balances safety, practicality, and durability, making it the ideal choice for a cutting board.

AK, N., CLIVER, D. and KASPAR, C. (1993). Decontamination of Plastic and Wooden Cutting Boards for Kitchen Use. [online] Available at: https://meridian.allenpress.com/jfp/article/57/1/23/195718/Decontamination-of-Plastic-and-Wooden-Cutting [Accessed 7 Mar. 2020]. 

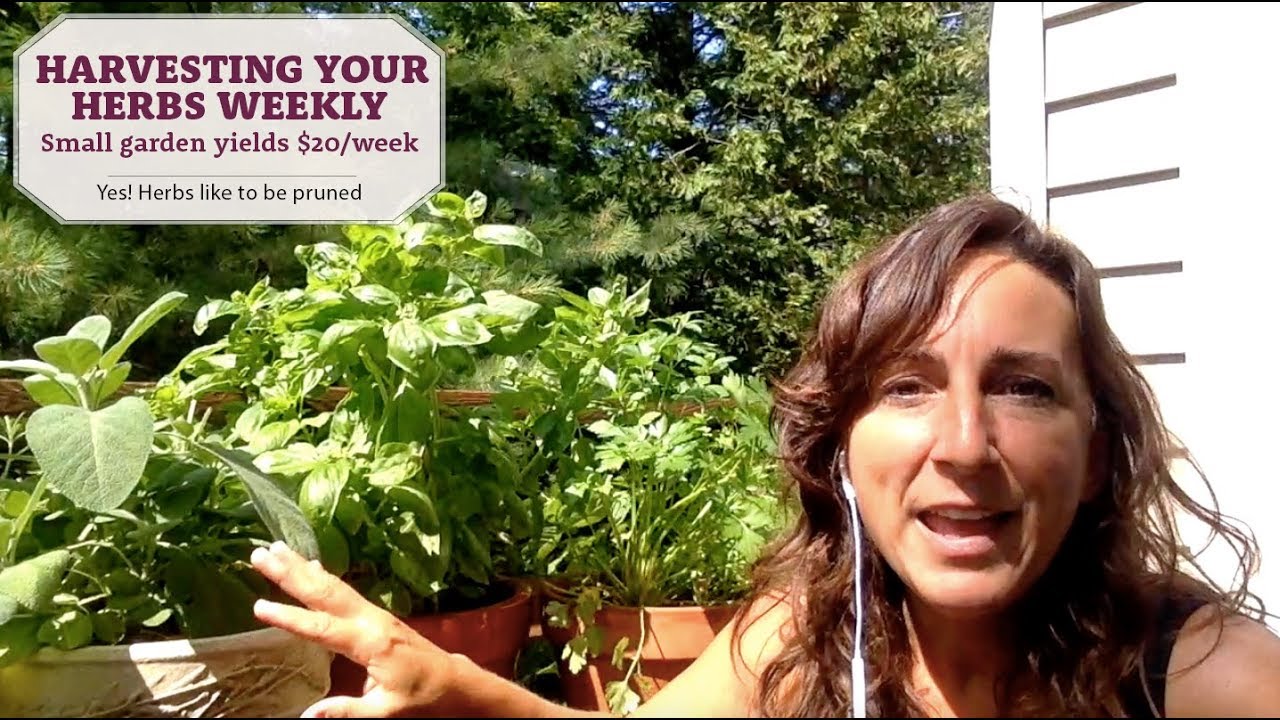
Grow $20 of Herbs Each Week – Small Container Garden

Do you have just a couple feet of sunny space and a short growing season? Growing herbs in containers could be the perfect solution for you. Not only are herbs easy to care for, but they can also provide you with fresh, flavorful ingredients every week. With a little attention and a few simple strategies, you could grow up to $20 worth of herbs each week in a small container garden. Here’s how you can do it, featuring some of my favorite herbs to grow and use in your meals!

Would you rather watch than read

‘Grow $20 of Herbs Each Week?’

Watch the video at the bottom of this post instead!

Basil: The Sweet Summer Herb

Grow $20 of Herbs Each Week - Rustic wooden bowl on Wooden Cutting board with a bunch of fresh basil leaves on the cutting board and a few in the bowl

Basil is the quintessential summer herb and an essential part of any small container garden. It thrives in warm temperatures and plenty of sunlight, making it ideal for growing in containers on patios or windowsills. Basil is incredibly versatile, great for everything from pesto to salads to pasta. Regularly pinch back the leaves to encourage new growth and prevent the plant from flowering. Do this by pinching the stem just above a set of leaves. This will split the stem and your plant will get bushy giving you double the harvest! If you’ve got a lot of basil, freeze the leaves in ice cube trays with olive oil to preserve that fresh, summery taste all year long.

Oregano: A Mediterranean Essential

Oregano is a hardy, low-maintenance herb that thrives in containers. It’s perfect for small spaces because it doesn’t require a lot of room to grow. Regular harvesting encourages new growth, so you’ll have fresh leaves throughout the season. Oregano is perfect for Mediterranean dishes like pasta, pizza, or grilled meats. You can also dry the leaves to use during the colder months, ensuring you have a constant supply of flavor all year long.

Rosemary: Fragrant and Versatile

Rosemary is another herb that thrives in containers. Its fragrant needles add a bold, piney flavor to dishes, making it a go-to for roasting meats, potatoes, and vegetables. Rosemary requires well-draining soil and a sunny spot, but once it gets going, it’s a powerhouse of flavor. Trim the stems regularly to keep the plant compact and bushy but avoid cutting the stem parts where they’re woody. Use fresh sprigs in roasted dishes or try infusing olive oil for a savory treat. As a bonus, rosemary can be a great companion plant in your garden, helping to deter pests.

Sage: Rich and Aromatic

Grow $20 of Herbs Each Week - Green Sage plant with a bud spike at the top with a background of other sage plants with purple flowers

Sage is an herb that’s easy to grow and adds a rich, savory flavor to dishes. It’s perfect for autumn recipes like roasted squash or stuffing. Sage loves full sun and well-drained soil, so be sure to place it in a sunny spot and avoid overwatering. This herb will continue to produce throughout the season, and regular harvesting will keep it growing strong. Try crisping sage leaves in butter for a delightful garnish or use them in soups and stews for added depth.

Mint: Easy and Refreshing

Mint is one of the easiest herbs to grow, but be careful— it can quickly take over your garden if not contained. Growing mint in a container keeps it in check and allows you to enjoy fresh leaves whenever you need them. Mint is perfect for adding to drinks, like refreshing iced teas and mojitos, or for garnishing desserts. It’s also great in savory dishes like lamb or in a homemade mint sauce. Since mint grows quickly, you can harvest it weekly and keep the plant thriving with minimal care.

A small container garden of herbs can be a game-changer when it comes to flavor and value. With a bit of care and regular harvesting, you can grow $20 worth of fresh herbs each week. From oregano to mint, each of these herbs offers something unique for your meals—whether you’re roasting vegetables, making pasta, or crafting refreshing beverages. So, grab a few containers, start planting, and let your herb garden bloom this season!

Would you rather watch than read

‘Grow $20 of Herbs Each Week?’

Watch the video below instead!

Grow $20 of Herbs Each Week - Small Container Garden

Ordering Seeds Like a Pro – Part 2

Welcome to Part 2 of our seed ordering journey! If you’ve read Part 1, you’ve already learned how to plan and select your seeds, along with the importance of sticking with old favorites and venturing into new experiments. In this second part, I’m going to share some practical tips to save money, promote self-sustainability, and order like a pro. Let’s jump right into it!

Would you rather watch than read

‘Ordering Seeds Like A Pro?’

Watch the video at the bottom of this post instead!

Let Them Re-seed

One way to save money and reduce waste is by letting your plants reseed themselves. Some plants naturally drop seeds that can sprout the following year, giving you a free crop for the season. Flowers like calendula and herbs such as cilantro tend to self-seed easily. If you let these plants reseed, you’ll enjoy an effortless supply of new seedlings every year—no need to reorder seeds for these varieties!

Grow Your Own Insecticide

Ordering Seeds Like a Pro - Marigold Plants with Blooms

Another cost-saving technique is to grow plants that naturally repel pests. By including varieties like marigolds, garlic, and nasturtiums, you can create a natural insecticide that helps protect your garden from bugs without using harmful chemicals. These plants work wonders for keeping pests at bay, and they also add beauty and diversity to your garden. It’s a win-win!

Order Like a Pro

When it comes to ordering seeds in bulk, be strategic. It’s not just about getting the best deals—it’s about ordering the right amount. Make sure you plan ahead and order what you need without overdoing it. Bulk buying works best when you know how much you’ll be using, and when you can spread the cost over many packets. By calculating the quantities you need, you’ll avoid buying more than you can realistically use in a season.

Find a Local Group to Bulk Order With

Ordering Seeds Like a Pro - 3 large seed bags filled with seeds on a table

If you want to take your bulk ordering to the next level, consider teaming up with a local gardening group, family, or neighbors. This way, you can share larger seed packets, reducing the cost for everyone involved. Many communities host seed swaps or organize bulk-order programs. By joining in, you’ll cut your seed costs dramatically while fostering a sense of community among fellow gardeners.


With these strategies, ordering seeds for your garden doesn’t have to be stressful or expensive. By selecting the right seeds, letting plants reseed, and teaming up with others to bulk order, you’ll have everything you need for a successful growing season. Here’s to a fruitful and cost-effective 2025 garden!

Would you rather watch than read

‘Ordering Seeds Like A Pro?’

Watch the video below instead!

Ordering Seeds Like a Pro

The 2025 growing season is upon us, and it’s time to get our seeds ordered and ready! For many of us, this is the most exciting part of the season—planning what to grow and how to make our gardens flourish. But it can also cause decision fatigue. In this two-part series, you’ll learn a successful approach to ordering seeds, from old favorites to exciting new experiments, plus some tips to help you save money along the way. Let’s dive into Ordering Seeds Like a Pro Part 1!

Would you rather watch than read

‘Ordering Seeds Lika Pro?’

Watch the video at the bottom of this post instead!

Ordering Seeds

The first step in ordering seeds is to take a moment to plan. Before adding anything to your cart, think about your available space, growing conditions, and what your goals are for the season. Are you focusing on flavor, yield, or maybe something new to try? Take a look back at what worked well in your garden last year, and think about areas you’d like to improve. When reviewing seed packets, pay close attention to key information such as days to maturity, space requirements, and pest resistance. This information helps you order with confidence, ensuring your selections are suited to your space and growing conditions.

Old Favorites

Ordering Seeds Like a Pro- Part 1 Wodden chest with seed packets stacked at an angle with the front row of seed packets opened to show various seeds

Each growing season, come back to varieties you know consistently gives great results. These old favorites are tried-and-true, and offer reliable harvests year after year. For example, you might order the same heirloom tomato variety or greens like red Russian kale and Swiss chard you know you enjoy. If you’re new to gardening, stick to a few trusted varieties– it’s an excellent way to build confidence and set the stage for a successful year ahead.

New Experiments

While it’s important to stick with your reliable favorites, it’s also exciting to try out new crops each year. Experiment with purple carrots, unique herbs, or colorful peppers! Try new varieties to bring a fun twist to your garden. Just be sure to do a little research before diving in. Knowing more about your new choices helps set realistic expectations, ensuring you’re prepared for any surprises that might come up as you grow

Ordering Seeds Like a Pro- Part 1 Woman in her backyard sitting at a table with potted plants holding a seed packet

Stay tuned for Ordering Seeds Like a Pro Part 2, where I’ll dive into how to save money by letting plants reseed, creating natural insecticides in your garden, and mastering the art of bulk ordering!

Would you rather watch than read

‘Ordering Seeds Lika Pro?’

Watch the video below instead!

Fix Leggy Seedlings with These Simple Tips

Growing seedlings indoors can be a rewarding experience, but it can also come with its challenges. If you’ve noticed your seedlings turning leggy (overly tall stems that bend over from the weight of the tiny leaves), wilting, or even turning purple, don’t worry—you’re not alone. These signs often indicate that something is off in your growing setup. Let’s break down what might be causing the issue and how you can fix it.

Would you rather watch than read

Fix Leggy Seedlings with These 3 Simple Tips?’

Watch the video at the bottom of this post instead!


The Mix to Fix those Leggy Seedlings

Fix Leggy Seedlings with These Simple Tips - 5 strong kale seedlings laid out on the dirt ready to plant.

One of the most common mistakes when starting seedlings indoors is using a poor-quality seed starting mix. A good mix is essential for seedling health. You want a well-draining, nutrient-rich medium to encourage strong root development. My go-to recipe is 4 parts screened compost, 1 part perlite, 1 part vermiculite, and 2 parts coconut coir. This combination ensures proper aeration and moisture retention without the risk of sogginess.

If you’re only using coco coir or peat moss (like the pods) to grow your seedlings, you need to know that these substrates have no nutrition for your seedlings. So your seedling will grow to the first set of leaves (the cotyledons) but quickly die thereafter from lack of nutrition. To keep your seedlings strong, you’ll need to add liquid nutrients.

Optimal Lighting for Seedlings

Seedlings require ample light to grow strong and healthy. Without it, they become leggy, stretching toward the light source. If you’re growing indoors, consider using grow lights for 12-16 hours per day minimum. Place the light source close enough to prevent stretching but far enough to avoid burning the delicate seedlings. 

Managing Algae Growth

Fix Leggy Seedlings with These 3 Simple Tips - 5 strong kale seedlings laid out on the dirt ready to plant.

Algae thrives in moist, warm environments and can quickly overtake your seedlings. While not directly harmful, algae can steal nutrients from the soil and impede seedling growth. To prevent this, keep the top of the soil free from excess moisture and ensure your growing area has proper airflow.

Recommendations for Healthier Seedlings
By following these steps—starting with the right soil mix, providing adequate light, avoiding overwatering, and managing algae—you’ll give your seedlings the best chance to thrive. 

If you notice persistent issues, consider adjusting your setup. Every plant is unique, and fine-tuning your approach will lead to better results. Take the time to evaluate your setup and make adjustments where needed. Happy growing!


Would you rather watch than read

‘Fix Leggy Seedlings with These 3 Simple Tips?’

Watch the video below instead!

Meet Martha: The Joy and Magic of Gardening with Kids

Big news ahead! We’re only days away from releasing the Joyful Garden Docuseries. Before we dive into that exciting journey, let’s hear a fun story from Martha, a valued member of our Grow Your Own Vegetables community. What’s Martha all about in this video? Gardening with Kids. It’s magical.

Martha, a retired gardener from Ontario, is living the dream of nurturing her garden and sharing the joys of gardening with her grandkids.

Watch the video at the bottom of this post instead to hear Martha’s story directly!


Gardening with Kids: A Special Connection

Meet Martha: The Joy and Magic of Gardening with Kids - Grandma and Grandchild planting red flowers

Martha’s love for gardening shines through when she shares how her granddaughter has enjoyed the garden from an early age. Even at just two years old, her granddaughter knew exactly where the carrots were growing and would eagerly pull them right from the ground and munch on them. “They taste so much better than what you buy,” Martha says with a smile.

This connection to fresh, homegrown food is one of the true joys of gardening. It’s not just about the harvest – it’s about the experience of nurturing something from the earth, watching it grow, and then enjoying the fruits of that labor.

Gardening with Kids: A Garden to Call Her Own

Martha’s granddaughter now has her very own little garden plot. She grows tomatoes, cucumbers, and anything else she can imagine. Martha explains that these plants are “things she wants to grow,” which helps make the garden experience feel personal. What you choose to grow impacts how you connect with your garden – and this is a great way to teach kids the importance of caring for something.

Gardening also creates a sense of independence. Her granddaughter is learning how to take ownership of her own little patch, fostering both pride and responsibility.

The Taste of Fresh, Homegrown Food

Meet Martha: Experience More Joy From Your Garden — Grandma and Grandchild standing in front of garden greens

There’s something magical about walking outside and picking vegetables directly from the garden. For Martha, it’s not just about growing food; it’s about the quality and taste. “You just walk out the door and get what you want,” she explains. Homegrown produce, like tomatoes and cucumbers, is often more flavorful than store-bought alternatives. Plus, there’s no rush or stress; it’s simply a joy to pick what you need when you need it.

This sense of convenience combined with the satisfaction of growing your own food makes gardening even more rewarding.

Gardening with Kids: Experience Joy and Connection

Martha’s story is a reminder of how gardening can strengthen bonds, create memories, and offer unique experiences for you and your family. Whether you’re growing food with kids or simply enjoying some time in nature, gardening brings pure joy.

Martha’s story invites you to reflect on your own garden experience and perhaps inspire you to share it with others. Gardening offers so much more than food; it gives you an opportunity to connect with nature, enjoy quality time with loved ones, and witness the beauty of growth in every season.

So, what’s stopping you from starting your own garden? Take a moment to enjoy the simple, joyful process of growing something beautiful with those you love!

Would you rather watch than read ‘Meet Martha’?

Watch the video below instead!

Share in the comments below:
How your garden brings you joy.

Unveiling Strategies and Mindsets to Thrive in Your Garden

Gardening is more than just planting seeds and watching them grow. It’s a process that requires the right garden strategies & mindsets to truly thrive. Whether you’re a seasoned gardener or just starting out, understanding how to approach your garden with care, attention, and patience will set you up for success. In this guide, we’ll explore how you can create a thriving garden by focusing on essential strategies and nurturing the right mindset.

Set Clear, Achievable Goals for Your Garden

Unveiling Strategies and Mindsets to Thrive in Your Garden - Goal Setting

Start by setting specific goals for your garden. Do you want a lush vegetable garden, vibrant flower beds, or a serene outdoor space? Having clear objectives will keep you focused and motivated. Break these goals down into smaller, manageable tasks. Instead of saying, “I want a beautiful garden,” aim for something concrete, like “I will plant five new flower varieties this spring.” This approach keeps you moving forward and helps measure progress.

Embrace Patience and Flexibility

Gardening is a journey that takes time. Plants don’t grow overnight, and sometimes, things don’t go as planned. Whether it’s unexpected weather or pest issues, challenges are part of the process. By adopting a patient mindset, you give your plants—and yourself—space to grow and adjust. Flexibility allows you to make changes along the way without feeling defeated. Remember, a healthy garden requires constant learning and adapting.

Build a Routine and Stay Consistent

Unveiling Strategies and Mindsets to Thrive in Your Garden - Routine Setting

Consistency is key to a thriving garden. Create a regular schedule for watering, pruning, and monitoring your plants. This doesn’t mean you have to work in the garden every day, but aim for steady attention over time. A weekly check-in will help you catch problems early, like pests or disease, and will keep your garden on track. This routine also gives you a sense of ownership and fulfillment as you watch your plants grow and develop.

Cultivate a Positive Garden Mindset

Gardening can sometimes be frustrating, especially when things don’t go according to plan. However, maintaining a positive attitude helps you stay motivated. Each setback is an opportunity to learn and improve. Celebrate the small victories, like the first bloom or a bountiful harvest. By staying optimistic, you’ll continue to find joy in the process and stay connected to nature.

A plant seed sprouting with street sign post and the signs THRIVING, GROWING, and WINNING

Learn from Experience and Experiment

Your garden is a constant learning experience. Pay attention to what works and what doesn’t. Maybe a certain plant thrives in one area but struggles in another. Test different strategies, and don’t be afraid to make mistakes. Experimenting helps you discover what suits your space and your gardening style. Over time, this knowledge will empower you to make better decisions and foster a more resilient garden.

Gardening isn’t just about planting—it’s about creating a thriving environment for your plants and yourself. By setting clear goals, embracing patience, building a routine, staying positive, and experimenting, you can unlock your garden’s full potential. Remember, gardening is a long-term commitment, but the rewards are worth the effort. Stay dedicated, and you’ll watch your garden flourish year after year.

Get the Guide on Creating a Garden that THRIVES!

Guide to a Garden that Thrives! eGuide