Grow Better Food with Healthier Soil

Growing healthy food begins with growing healthy soil. Whether it’s kale or carrots, every superfood starts with super soil. But how do you know if your soil is actually “super”? You don’t need a lab coat to figure it out—just the right tests, terms, and a little know-how. Let’s dig in and build your soil IQ so your garden can grow strong, clean, and nutrient-rich.

3 Key Terms to Know for Soil Success

You’ll hear soil experts talk about texture, structure, and tilth. These three terms help you understand what your soil can do.

Texture tells you the mix of sand, silt, and clay. Ideal soil—called loam—has a balanced mix and feels crumbly in your hand.
Structure describes how soil particles bind together. Good structure lets roots grow deep and allows water to drain well.
Tilth is how workable your soil feels. When tilth is good, soil is soft, rich, and easy to plant in.

Knowing these terms helps you read your soil and respond with the right care.

3 Must-Do Soil Requirements

Even healthy-looking soil can hide problems. Do these three things before planting superfoods:

1. Run a heavy metal test once. It’s a one-time check that makes sure your soil isn’t contaminated with dangerous toxins like lead or arsenic.
2. Get a soil nutrient test. This tells you what your soil has and what it lacks, like nitrogen or potassium—both vital for plant health.
3. Add organic matter. Compost, aged manure, or leaf mold improve nutrient levels and help maintain structure and tilth.

You can’t grow healthy food in poor soil. These steps give you a clear start.

Use the Soil Jar Test

Want a free, fast way to learn your soil type? Use the soil jar test.

Take a handful of your soil, add water, and shake it in a jar. Let it settle overnight. The layers that form show you how much sand, silt, and clay are in your mix. Loam is the ideal—it has roughly 40% sand, 40% silt, and 20% clay. This test gives you a visual read on texture and hints at your soil’s structure.

Learn more about how to test your soil with the soil jar test in our blog here.

Growing in Containers? That’s Not Soil

if you grow in pots or raised beds, you’re using a soil mix, not true soil.

Peat moss or coconut coir holds moisture. Compost adds nutrients. Vermiculite and perlite improve drainage and air flow. You’ll need to manage nutrients more often, since container “soils” don’t have the living systems of real ground soil.

Build Soil, Grow Power

Growing healthy, fresh food needs super soil—and now you know how to create it. Test your soil, learn the texture, improve the structure, and feed it with organic matter. Whether you’re planting in the ground or a pot, what you grow in shapes what you grow. Better soil, better food, better you.
Do You Have to Be 100% Committed to Have a Successful Garden?

Short answer: No.

Growing your own food is rewarding, meaningful, and empowering, but it does not require perfection or constant attention. Gardening takes time, patience, and intention, yet “100% commitment” looks different for every gardener and every season of life.

Whether you’re growing a few herbs on a windowsill or tending a full vegetable garden, success comes from alignment … not from doing everything “right.” What a relief, right?

Gardening isn’t about perfection. It’s about showing up, learning as you go, and enjoying the harvest along the way.

What Does “Garden Commitment” Really Mean?

Before diving in, it’s worth pausing to reflect.

What does commitment mean to you?

Is it about growing healthier food, reducing grocery bills, reconnecting with nature, or simply enjoying fresh meals at home?

Clarifying your “why” helps you set a realistic, sustainable level of commitment. When you release the pressure to be perfect, gardening becomes less stressful and far more enjoyable.

The missteps, missed waterings, and uneven harvests aren’t failures; they’re part of the learning process.

How Much Should You Commit If You’re Just Starting?

If you’re new to gardening, starting small is one of the best decisions you can make.

Begin with herbs or a few easy vegetables. This allows you to build confidence, understand how much time you can realistically give, and experience early success. Small wins create momentum — and momentum is far more powerful than perfection.

A thriving garden doesn’t begin with doing everything. It begins with doing one thing well.

Is There a “Right” Level of Commitment for Gardening?

There isn’t.

Some gardeners love experimenting, planting multiple crops, and tending their garden daily. Others prefer a simpler, seasonal approach with minimal maintenance. Both are valid. Both can be successful.

Your level of commitment may even change throughout the year or as life shifts … and that’s okay. Gardening is flexible by nature, and your approach can be too.

Can You Be Successful as a “50% Committed” Gardener?

Absolutely.

If you’re juggling a busy schedule, simplifying your garden can make all the difference. Low-maintenance crops, no-dig methods, mulching, or self-watering containers can dramatically reduce the time and energy required.

Instead of trying to do it all, set manageable goals, like harvesting from a few key plants each week. Less pressure often leads to more consistency, and consistency is what truly supports a healthy garden.

Why Does 100% Commitment Still Feel Overwhelming Sometimes?

Even gardeners who feel “all-in” can experience overwhelm.

When that happens, it’s often not a lack of commitment, it’s a sign that something needs adjusting. Too many crops, overly complicated systems, or unrealistic expectations can drain joy from the process.

Reassessing how you garden (not how hard you try) can bring balance back into the experience.

What’s the Best Way to Stay Consistent Without Burning Out?

Start small. Start with one thing.

One bed.
One vegetable.
One habit.

Focusing your energy reduces pressure and helps build confidence. Once that one thing feels manageable, expansion becomes natural … not overwhelming!

So… Do You Really Need to Be 100% Committed?

No — and you never did.

Gardening isn’t about being perfect or doing everything at once. It’s about growth, learning, and honoring your pace. Whether you’re giving 50% or 100%, progress still counts.

Stay true to what works for you. Embrace imperfection. Your garden will grow — and so will you.

Smart Water Harvesting: Simple Ways to Capture Every Drop in Your Garden with Greg Peterson

Do you have questions about how to harvest water for your garden, where to start, or how to make it work without expensive equipment? You’re not alone. Water harvesting can seem complicated at first—but it doesn’t have to be. In this article, we’ve structured the information in a simple Q&A format, so you can find practical answers to common questions and start turning every drop of rain and greywater into a thriving, self-watering garden.

Why is water harvesting important for gardeners?

Most gardeners focus on sunlight, soil, and seeds—but water is one of nature’s most precious resources. With unpredictable rainfall and rising costs, harvesting and directing water isn’t just eco-friendly—it’s essential for a sustainable garden. Capturing water that would otherwise run off helps nourish plants, improve soil health, and reduce water bills.

As Greg Peterson reminds us, even in dry climates, understanding how water moves through your space can transform your garden:

“Go out when it’s raining and look. See where the water flows. Get wet!
That’s how you learn what your garden really needs.”

What is water harvesting, and what types should I know about?

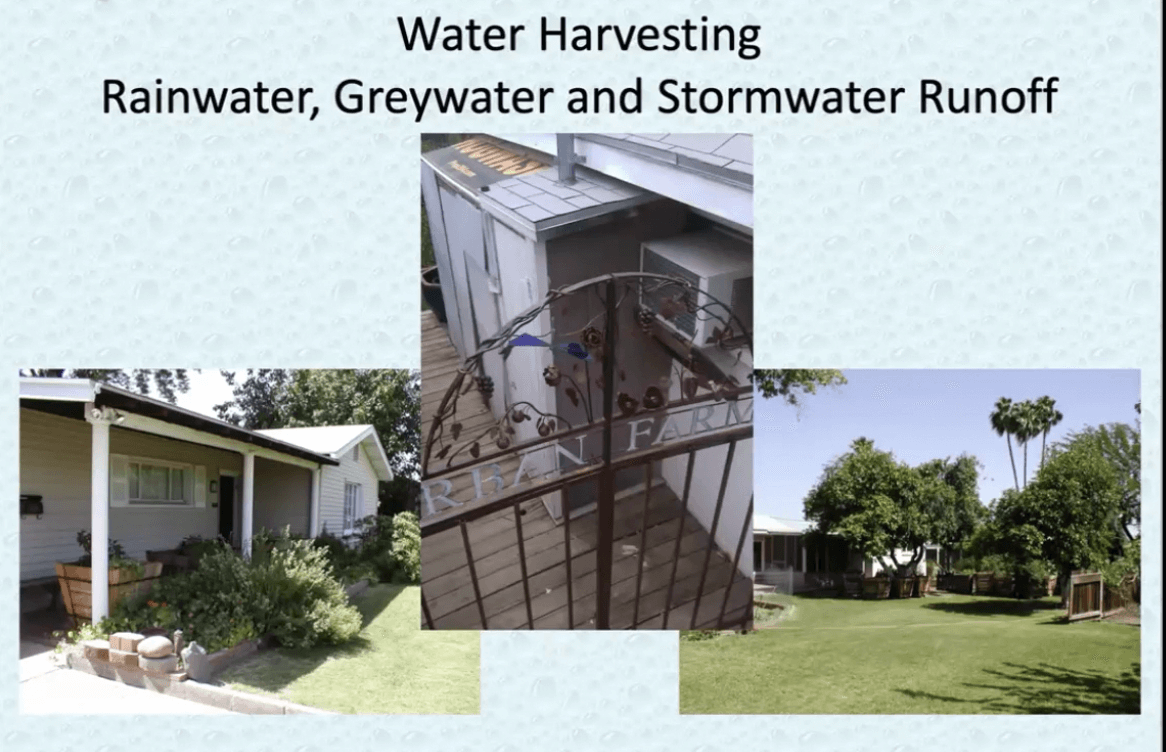
Water harvesting is the practice of capturing, directing, and reusing water where it falls, instead of letting it wash away. Greg Peterson breaks it down into three main types:

Rainwater harvesting: Collecting rainfall from roofs and other hard surfaces.
Greywater harvesting: Reusing water from sinks, showers, and laundry (not toilets or kitchen sinks).
Stormwater harvesting: Capturing run-off from streets, driveways, or other hard surfaces.

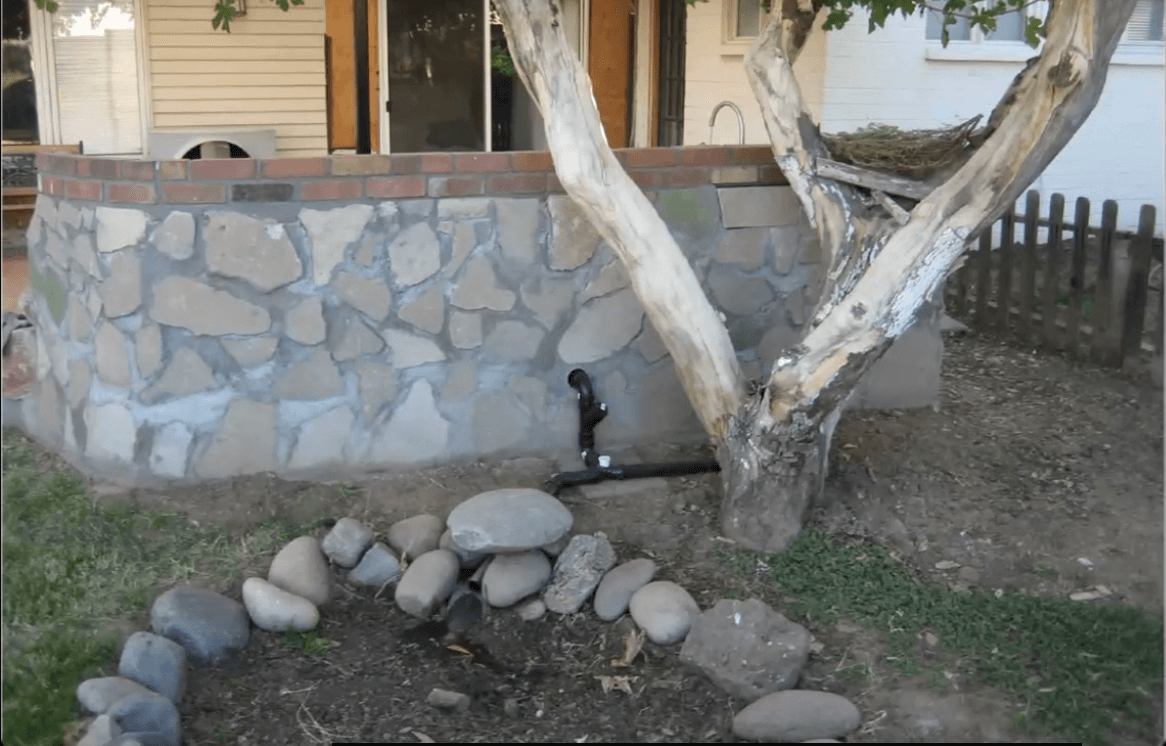
Even in places with limited rainfall—like Greg’s Urban Farm in Phoenix, which averages only seven inches per year—these techniques can provide thousands of gallons of usable water.

Do I need expensive tanks or equipment for water harvesting?

Not at all. Many people imagine rainwater harvesting as large, costly storage tanks—but Greg emphasizes smart design over big budgets.

For example:

• He installed a 7½-foot concrete culvert tank for $2,500.
• Later, he built a system with PVC piping and a half-buried barrel for just $80—equally effective.

The key is to focus on directing water into the soil, letting gravity nourish your plants naturally. Even a slight slope in your driveway or garden path can guide rain into garden beds instead of out to the street.

How can I safely use greywater in my garden?

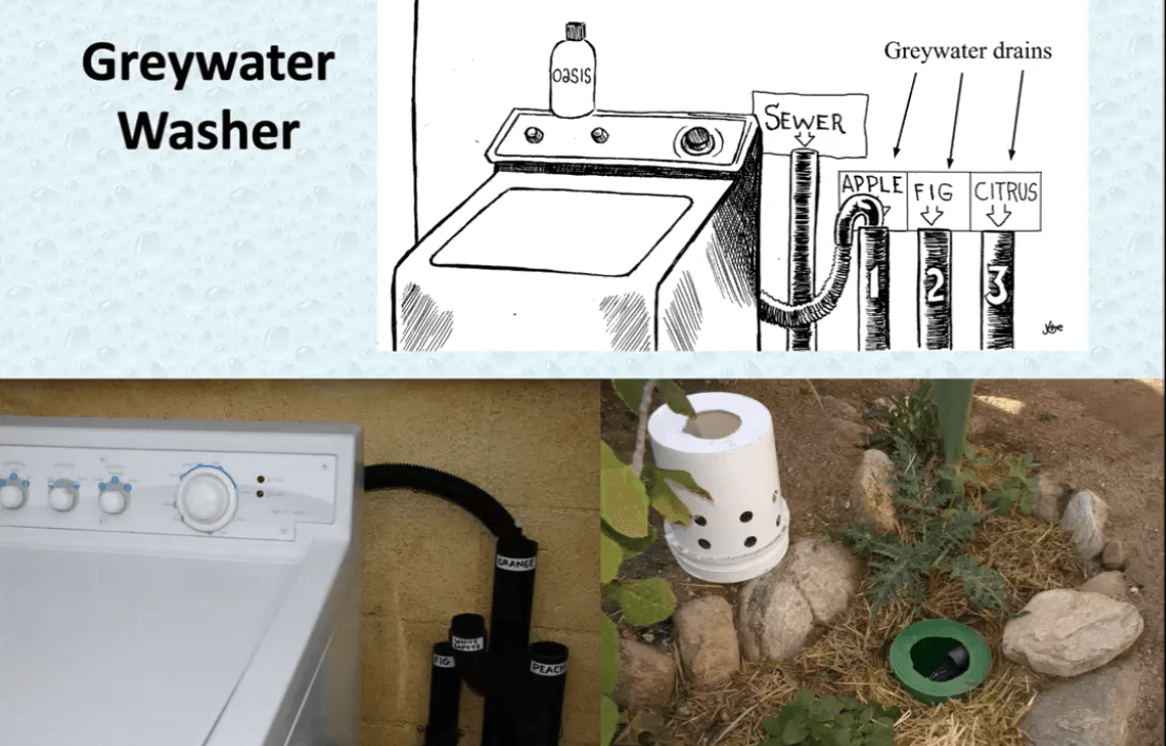
Greywater—used water from sinks, showers, and washing machines—can be a free irrigation source when handled correctly:

• Never store greywater; use it immediately to prevent it from becoming “blackwater.”
• Apply it below the surface in mulch basins, not through drip systems.
• Use eco-friendly, biodegradable soaps that break down into fertilizer.
• Direct greywater to perennial plants like trees and shrubs, not leafy greens or root vegetables.

At his Urban Farm, Greg even built systems using reclaimed materials, such as an outdoor kitchen sink directing rinse water into mulch basins, where the woody mulch acts like a sponge, slowly releasing water to nearby plants.

What’s the easiest way to start harvesting water at home?

Greg’s advice is refreshingly simple: start small.

• Redirect a downspout into a garden bed.
• Dig a mulch basin near a tree or shrub.
• Reuse water from a bathroom sink for perennial plants.

Observe how water flows across your property and gradually expand your efforts. Each small project teaches you about your landscape and moves you closer to a self-watering garden ecosystem.

Why should I consider water harvesting for my own garden?

Implementing water harvesting:

• Conserves a precious resource
• Creates healthier soil and stronger plants
• Reduces your water bills
• Helps you design a garden that can thrive even in dry conditions

Even small changes, like a single mulch basin or redirected downspout, can have a lasting impact. Over time, your garden can essentially water itself, making gardening easier, more sustainable, and more rewarding.

Can water harvesting work in any garden, big or small?

Yes! Whether you’re growing in containers, a small backyard, or even a shared urban space, water harvesting strategies can scale to your garden’s size. The principles of capturing, directing, and reusing water are universal—it’s just about observing how water moves and making small adjustments.
How can I learn more about water harvesting techniques from Greg Peterson?

This article covers the basics, but the full Water Harvesting Masterclass goes deeper with:

• Step-by-step demonstrations
• System designs
• Resources for building rainwater and greywater systems in any climate

Whether you live in a wet or dry region, these strategies can help you create abundance in your garden.

Greg Peterson

Urban Farm U

For over 32 years, Greg Peterson created one of Phoenix’s first environmental showcase homes for urban farming. The ¼-acre yard featured a primarily edible landscape with over 80 fruit trees, rainwater and greywater harvesting, solar applications, and extensive use of reclaimed and recycled building materials.

In 2003, he founded UrbanFarm.org—an online hub for urban farming education—and later launched the Urban Farm Podcast, which has released over 750 episodes and earned more than four million listens. Greg continues to inspire gardeners worldwide to create resilient food systems right where they live.

How to Harvest and Store Kale for Maximum Freshness and Yield

Properly Harvesting and Storing Kale: Tips for Success

Kale is a superstar in the garden, packed with nutrients and flavor. However, the key to keeping your kale plants healthy and productive lies in how you harvest and store them. Proper harvesting ensures you get the most out of your plants, while effective storage allows you to enjoy your kale even after the growing season. Let’s dive into how to harvest your kale properly and store it for long-lasting freshness.

The #1 Mistake: Not Harvesting Deeply Enough

One of the biggest mistakes people make when growing kale is not harvesting deeply enough. Many gardeners only trim the outer leaves, which can stunt the growth of the plant. To keep your kale healthy and producing more leaves, it’s important to harvest the older, outer leaves all the way down to the base of the plant. This encourages new growth from the center, allowing the plant to continue thriving throughout the season.

When you only trim the outer leaves, the plant can become leggy, and new growth slows down. By cutting deeper, you open up space for fresh leaves to emerge from the center, ensuring you have a continuous harvest.

How to Harvest Kale: Leave Enough for Growth

When harvesting kale, it’s important to be selective about how much you cut. Aim to leave about 3-7 leaves on the plant after harvesting to ensure it continues to grow strong and healthy. Remove the larger, mature leaves from the outside of the plant and leave the younger leaves in the center. This technique not only ensures continued growth but also maintains the plant’s ability to produce fresh, tender leaves.

Always use sharp, clean scissors or pruning shears to cut the leaves, making sure to avoid damaging the stem or the newer growth. Harvesting should be done weekly to keep the plant productive and prevent it from becoming overgrown.

Storing Kale for Freshness

Once you’ve harvested your kale, proper storage is key to keeping it fresh for as long as possible. Start by removing any damaged or yellow leaves before storing. You can store kale in the fridge by wrapping it in a damp paper towel and placing it inside a plastic bag or container. This helps keep it crisp for up to 5-7 days.

If you want to store kale for longer periods, consider freezing it. To do this, blanch the kale leaves for a few minutes in boiling water, then transfer them to an ice bath to cool down quickly. Once the leaves are cooled, dry them thoroughly and store them in an airtight container or freezer bag. Frozen kale can last for up to 6 months and is perfect for soups, smoothies, or sautéing.

Conclusion: Harvest Smart, Store Well

Harvesting kale properly ensures your plants stay productive and healthy throughout the growing season. By harvesting deeply enough, leaving the right amount of leaves behind, and storing it effectively, you can enjoy fresh kale for weeks. Whether you’re using it for fresh salads, adding it to soups, or freezing it for later, following these simple steps will help you make the most of your kale harvest.

How to Grow Your Own Vegetables and Save Money on Groceries

Save on Groceries with Your Own Garden

Grocery bills keep climbing, but there’s a simple way to fight back: grow your own vegetables. A home garden can cut costs dramatically, saving you hundreds, or even thousands, every year. By learning what and when to plant, you’ll maximize your space and harvest fresh, budget-friendly produce.

Start with What You Eat

Begin by listing the vegetables and herbs your family buys most often. Staples like basil, cilantro, tomatoes, and lettuce are easy to grow and cost just pennies compared to store prices. Focusing on foods you actually enjoy ensures your garden delivers the biggest savings.

Maximize Your Space

Even without a big backyard, you can grow plenty. Balconies, patios, and even sunny windowsills are perfect for high-yield crops like lettuce, herbs, and tomatoes. Don’t be discouraged by a lack of land—small spaces can produce an impressive amount of food with some creativity. With a little creativity, small spaces can produce an impressive harvest.

Know Your Growing Conditions

Every garden is unique. Sunlight, soil, wind, and even nearby structures all affect what will thrive in your space. The good news? You can create microclimates—like using row covers to keep plants warmer or placing heat-loving crops near a sunny wall—to expand what you’re able to grow. Understanding these conditions helps you choose the right crops and avoid wasted effort. Our Beginning Crop Planning Micro Course is perfect if you’re just starting out, while our Crop Planning Course offers advanced strategies for experienced gardeners who want to fine-tune their harvests.

Start from Seed for Bigger Savings

Buying seedlings is convenient, but starting from seed indoors gives you the best return on investment. Seeds are inexpensive, and you’ll often end up with extra plants to trade or share. Over time, this small step saves the most money.

Preserve Your Harvest for Year-Round Savings

Plant more than you can eat today to enjoy tomorrow. Some vegetables, like carrots, potatoes, and onions, keep well with little effort. Others can be frozen, canned, or fermented to last all year. If you are looking for guidance as you embark on preserving your food, our Preserve the Harvest Course teaches you step-by-step methods to stretch your garden’s value far beyond the growing season.

Gardening Is More Than Saving Money

Beyond the financial benefits, gardening gets you outdoors, boosts your health, and provides a real sense of accomplishment. It’s also a fun way to teach kids where food comes from. Plus, nothing beats the taste of fresh, homegrown vegetables.

Start Saving Today

Whether you begin with a few pots of herbs or a full backyard garden, every step reduces your grocery bill and improves your health. And if you’d like extra support, our Fresh Food Essentials Course shows you how to grow $400 worth of groceries in just 40 days.

3 Empowering Benefits of Container Gardening

Container gardening opens up a world of possibilities, offering flexibility, control, and accessibility. Whether you’re growing in a small space or seeking to make gardening easier on your body, container gardening has empowering benefits for all gardeners. Let’s dive into how containers can transform your gardening experience.

1. Accommodating Picky Plants!

One of the most empowering benefits of container gardening is the ability to cater to even the most particular plants. In traditional gardens, your soil structure and nutrients are limited by what’s available in the ground. With containers, you can customize the soil composition and adjust the nutrient mix to meet the needs of a wide variety of plants. Whether you’re growing plants that require specific pH levels or those that thrive in well-drained soil, containers give you the control to create the perfect growing environment. This means you can grow more diverse plants that wouldn’t otherwise thrive in your native soil.

2. Making the Most of Your Garden Space

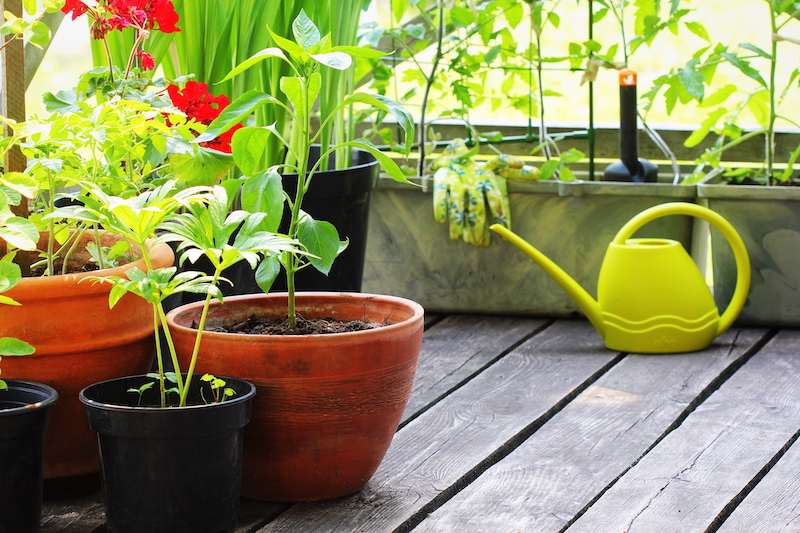
No matter how much space you have, container gardening lets you maximize it. Whether you’re working with a tiny apartment balcony, a rooftop, or even windowsills, containers let you grow both outdoors and indoors. You’re not limited to just the ground—you can place containers in any sunny spot. This makes gardening accessible to people with limited outdoor space, while still giving them the freedom to create their own green oasis. Plus, containers are portable, so you can move them around to optimize sunlight exposure or protect them from harsh weather.

3. Accessibility for Gardeners with Limited Mobility

As many gardeners age, physical challenges can make traditional gardening methods more difficult. The bending, kneeling, and heavy lifting required for in-ground gardening can take a toll. Container gardening, however, offers a solution for gardeners with limited mobility. Raised containers, vertical planters, and pots at accessible heights reduce the physical strain and make it easier to tend to plants. You can garden from a comfortable standing or sitting position, allowing you to continue enjoying the therapeutic benefits of gardening without the discomfort. Container gardening creates a more accessible, sustainable gardening practice for everyone.

Whether you have picky plants, limited space, or physical limitations, container gardening empowers you to grow what you love with more flexibility and control. It allows you to customize the environment for your plants, maximize your available space, and keep gardening accessible for everyone. Start your container garden today and discover how much more you can grow with just a few pots!

Please share in the comments below ways that you’ve added ease into your gardening process with container gardening.


Bats as Heroes: How Partnering with Nature Saved a Town

Nature has incredible power. From fleas jumping hundreds of times their body length to dandelions rooting anywhere, nature’s abilities can seem magical. But what if nature could also solve human problems like providing easy organic garden pest solutions? Instead of always relying on man-made solutions, could we partner with nature for answers? Dr. Charles Campbell did just that—and saved an entire town.

Dr. Charles Campbell’s Unconventional Solution

In 1907, malaria was devastating a small community near San Antonio. Dr. Campbell, who had previously helped control a typhus outbreak, focused on malaria next. Though quinine could manage symptoms, it wasn’t a cure or prevention. Campbell turned to bats, one of the most feared and misunderstood creatures. Despite initial setbacks, he succeeded in establishing a bat colony in Lake Mitchell, where malaria had infected 89% of the population and mosquito swarms were overwhelming.

The Bat Colony’s Success

In 1911, Dr. Campbell built a bat roost, and within two nights, 250,000 bats arrived. While methods like insecticides and draining marshes failed to control mosquitoes, the bat colony consumed around 750 million mosquitoes each night. By 1913, malaria cases stopped entirely. This success demonstrated the immense power of partnering with nature, thinking outside the box, and overcoming fear and superstition.

More Than Just the Solution

Working with nature isn’t just about the benefits we gain—it’s about restoring balance. The bat colony helped control an out-of-control mosquito population, which in turn restored balance to the ecosystem. Dr. Campbell’s willingness to experiment and fail allowed him to discover an effective solution. His observations even included noticing mosquito flight tones, revealing how bats use echolocation to track prey. This insight predated the scientific discovery of echolocation in 1938.

The Bigger Picture: What Could We Create Together?

Dr. Campbell’s success asks an important question: What if we thought differently about nature’s role in solving modern problems? By partnering with nature, we could have easy organic garden pest solutions address many of today’s challenges and create a more balanced world. The possibilities are endless if we embrace unconventional ideas.

Dr. Campbell’s work shows the power of thinking outside the box. By partnering with nature, we can create a healthier, more sustainable future. His story reminds us that working with nature may be the key to solving our most pressing problems—and that our gardens, both literal and metaphorical, may hold untapped solutions.

Garden Beneficials Micro Course

Related articles to create easy organic garden pest solutions you may enjoy:

Keys to Partner with Mother Nature
Why You WANT Pests in Your Garden
Small Scale Vermicomposting You Can Do Anywhere

Do you partner with nature in your garden? Share a time when you learned the power of partnering with mother nature in the comment section below!

3 Strategies to Prevent Pests & Diseases Organically – Early in the Growing Season

As the growing season begins, pests like aphids and squash bugs can threaten your crops. Preventing garden pests & diseases early is crucial. By creating the right conditions and using organic methods, you can protect your plants from pests and diseases from the start.

Would you rather watch than read?

3 Strategies to Prevent Pests & Diseases Organically – Early in the Growing Season?’

Watch the video at the bottom of this post instead!

The 3 Conditions That Make Plants Susceptible to Diseases

Powdery Mildew (1) Garden Pests & Diseases

To prevent garden pests & diseases, it’s essential to understand how they spread. For a plant to get infected, three things need to align:

1. Pathogen present: A harmful pathogen, such as a fungus, bacteria, or virus, must be nearby.

2. The plant is vulnerable: The plant must be in a weakened or susceptible state.

3. Favorable conditions: Conditions like high humidity or excessive moisture must be present for pathogens to thrive.

If all three conditions align, diseases can spread quickly, especially in organic gardens where synthetic chemicals are avoided. Preventing disease outbreaks means disrupting one or more of these factors. Here are three strategies to help!

Strategy #1 – Healthy Soil for Strong Plants

Healthy soil is the foundation of pest and disease prevention. Plants in nutrient-rich, balanced soil are more resilient. Adding compost enriches the soil with beneficial microbes that fight harmful pathogens, improve water retention, and reduce drought stress. Strong plants are naturally less susceptible to pests and diseases.

Strategy #2 – Choose Pest-Resistant Varieties

Pests are drawn to food and shelter, so planting pest-resistant varieties is one of the best ways to prevent infestations. For example, some squash varieties are resistant to squash vine borers. By choosing pest-resistant plants, especially those favored by specific pests, you reduce the risk of issues. Regularly inspect plants and act quickly if pests appear.

Strategy #3 – Harvest Regularly to Minimize Attractants

Pests are attracted to overripe or decaying vegetables. Harvesting crops at their peak not only gives you fresher produce but also prevents pests from moving in. Overgrown plants or vegetables left too long in the garden can attract pests looking for food and shelter. Regular harvesting helps keep your garden tidy and discourages pests from settling in.

Taking proactive steps early in the season can save time and frustration later. Focus on building healthy soil, choosing pest-resistant varieties, and harvesting frequently. These strategies will help ensure a productive, pest-free garden. Organic gardening thrives when a balanced ecosystem allows healthy plants to flourish and pests stay in check.

Would you rather watch than read?

‘3 Strategies to Prevent Pests & Diseases Organically – Early in the Growing Season?’

Watch the video below instead!

3 Strategies to Prevent Pests & Diseases Organically - Early in the Growing Season

Microgreens and Sprouts… What’s the Difference?

Microgreens and sprouts often get grouped together, but they’re not the same. If you’ve ever wondered which is better or what sets them apart, you’re not alone. Knowing the difference helps you choose the best option for your meals, your health, and even your growing space. Let’s break it down so you can feel confident reaching for the right greens.

Image of Microgreens with the blog title "Benefits of Microgreens and Ways to Enjoy Them"

Growth Process Makes All the Difference

Sprouts grow entirely in water, usually in a jar or tray. You eat the seed, root, stem, and tiny leaves. They’re ready in just a few days. Microgreens grow in soil or a growing medium and are harvested later—often after 7–14 days. That extra growing time gives them more flavor and a bigger nutrient boost.

Texture and Taste Set Them Apart

Sprouts have a soft, juicy crunch. They taste mild and slightly nutty, depending on the seed type. You’ll usually find them in sandwiches or wraps.

Microgreens, on the other hand, offer a richer variety of textures and flavors. Some are peppery, like radish. Others are earthy, like beet greens or bright like basil. They’re perfect for garnishes, salads, and anything that needs a fresh, bold finish.

A person holding a small chunk of microgreens

Microgreens Offer More Nutrients

Both are healthy, but microgreens are the nutritional winners. Because they grow longer and absorb light and nutrients from the soil, they develop higher levels of vitamins, minerals, and antioxidants.

If you’re looking to boost your meals with a serious dose of nutrition, microgreens are the better choice. But if you want something quick and light, sprouts still have their place.

Safety and Storage Tips

Sprouts grow in warm, humid conditions—ideal for the seeds and bacteria. That’s why you often see food safety warnings on raw sprouts. Always rinse them well and buy from a trusted source.

Microgreens are less risky since they grow above ground and in open air. They still need a rinse, but their is less risk of contamination when you grow microgreens correctly and they tend to stay fresher longer and store better in the fridge.

Sprouts and microgreens both have something to offer. Sprouts are quick, light, and great for simple meals. Microgreens bring bold flavor, vibrant color, and a big boost of nutrition. When you know the difference, you can choose the right green for your goals—and enjoy them in a way that supports your body and your taste buds.

More Recipes to Enjoy Your Harvest!
Delicious Microgreens Recipes

Benefits of Microgreens and Ways to Enjoy Them

Microgreens are small but powerful. These tiny greens pack a punch of nutrients, flavor, and beauty—all in one bite. Whether you grow them yourself or grab them at the market, adding microgreens to your meals is one of the simplest ways to boost your health. And the best part? They’re incredibly easy to enjoy.

Image of Microgreens with the blog title "Benefits of Microgreens and Ways to Enjoy Them"

Microgreens Are Nutrient Powerhouses

Don’t let their size fool you—microgreens are rich in vitamins, antioxidants, and minerals. You’ll often get more nutrients from a handful of microgreens than from a full serving of mature greens.

In an article from NPR, author Eliza Barclay shared a study conducted by Gene Lester, the National Program Leader of Nutrition and Food Safety/Quality for the USDA that focused on the amount of nutrients in microgreens. The study included 25 varieties of microgreens, and they tested for four groups of vitamins and other phytochemicals. Their findings showed “leaves from almost all of the microgreens [tested] had four to six times more nutrients than the mature leaves of the same plant.” Some variation was found from species to species, just as is also found in mature species.

Microgreens are especially high in vitamins C, E, and K, and many are packed with beta-carotene. Adding them to your meals helps support your immune system, skin, and energy levels naturally.

Microgreen TINY

Support Your Body, Naturally

Microgreens can help reduce inflammation and protect your cells from damage. They’re full of phytonutrients that your body loves. If you’re focused on heart health, digestion, or clearer skin, these greens belong on your plate. They’re also low in calories but high in flavor—so you get the benefits without the bulk.

Elevate Everyday Meals

Benefits of Microgreens

Microgreens aren’t just healthy—they’re delicious. You can sprinkle them on salads, stir them into soups, or blend them into sauces. Their fresh, crisp taste adds a pop of brightness to any dish.

They pair especially well with creamy foods. Try topping a warm bowl of cream of greens soup with peppery arugula microgreens for a beautiful finish. Or toss them into your favorite salad to level it up with texture and taste.

Add Microgreens to Soups and Salads

You don’t need to overthink it. Add a pinch of microgreens right before serving your soup or salad. They hold up well to warm dishes and offer a satisfying contrast in both flavor and temperature.

Try mixing them into a veggie-packed salad, or place a small mound of microgreens in the center of your bowl as a garnish for soup—it looks elegant and tastes amazing.

Microgreens may be tiny, but their benefits are huge. They’re an easy way to support your health, improve your meals, and bring beauty to your plate. Whether you’re tossing them in salads, blending them into soups, or simply snacking on them fresh, microgreens offer a simple path to feeling nourished, naturally.

Ready to learn how to grow your own microgreens? Check out our Grow Microgreens Anywhere Micro Course, which teaches you everything you need to grow microgreens right at home!