How to Make Gardening Easier: The Missing Foundation Every Home Gardener Needs

There are two ways to garden.

The first way: You plant what sounds good, water when you remember, troubleshoot problems as they appear, and hope for the best. Some seasons are okay. Most feel like a battle. You’re working hard, but the results don’t match the effort.

The second way: You start with a foundation that makes everything easier. Your soil does half the work. Your plants resist pests naturally. Problems rarely show up because you prevented them before they started. And instead of fighting your garden, you’re actually enjoying it.

Most gardeners were never taught the second way. They’re working twice as hard because they’re missing the foundations that make gardening feel effortless. And once you understand what those foundations are, everything changes.

This article shares insights from the Superfood Garden Summit, where expert gardeners break down the systems that transform struggling gardens into thriving ones—but there’s more nuance to these methods than what fits in one post.

🌱 Ready to learn the complete system? Register free for the Superfood Garden Summit and get step-by-step guidance from gardeners who make it look easy.

Why Gardens Feel Hard: It’s Not Your Fault

Most gardening advice jumps straight to what to plant and when to plant it. That’s like being handed a recipe without knowing how to turn on the stove.

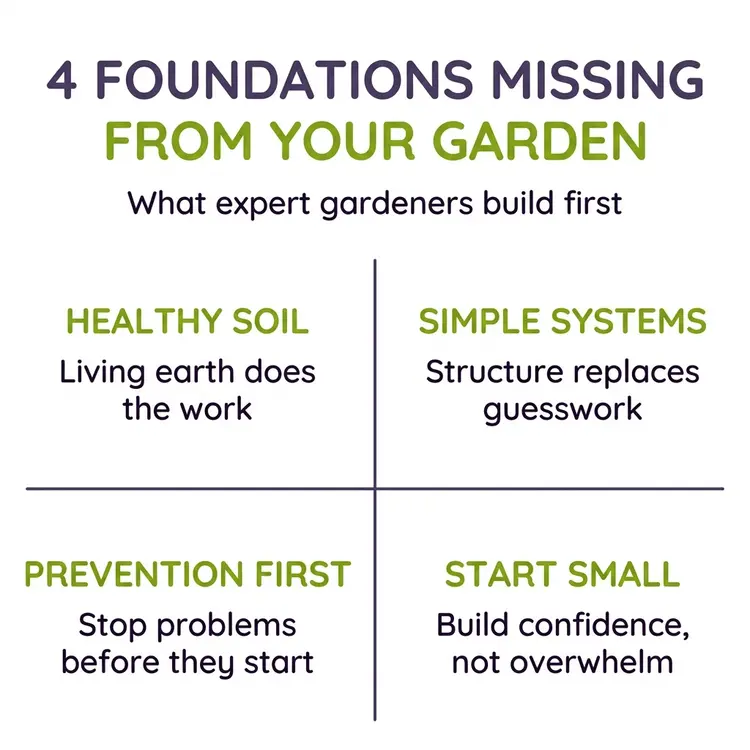
The truth is, why is gardening so hard for beginners? Usually because they’re missing foundational knowledge about soil health and simple growing systems. Gardening success comes from foundations, not effort alone. When you start with the right systems in place, everything becomes easier. Plants grow stronger. Problems show up less often. And you spend less time troubleshooting and more time enjoying your garden.

The gardeners who make it look easy aren’t working some kind of magic. They’re working with nature instead of against it.
Soil Before Seeds: The Foundation That Changes Everything

How do you improve garden soil naturally? And why does soil health matter more than anything else?

Healthy soil is the true starting point for every successful garden. When your soil is alive with beneficial microorganisms and organic matter, plants naturally resist pests, absorb nutrients efficiently, and produce better yields, even without expensive fertilizers.

Most gardeners focus on the plant. What variety to grow. How much sun it needs. When to harvest. But the plant is only as strong as what’s feeding it below the surface.

Living soil, full of microorganisms, fungi, and organic matter, works together to support plant health. When soil is alive, it holds water better, releases nutrients at the right pace, and helps plants resist pests and disease naturally.

When soil is depleted or compacted, plants struggle no matter how much you water or fertilize.

How to Build Regenerative Soil for an Abundant Harvest

You don’t need a soil science degree to start building healthier soil—but you do need to understand which practices actually regenerate soil life versus which ones accidentally work against it.

During the Superfood Garden Summit, soil expert Matt Powers breaks down his proven approach to building regenerative soil in his session Regenerative Soil for an Abundant Harvest.

Matt’s approach isn’t about expensive products or complicated techniques—it’s about understanding how soil regenerates naturally and working with those processes instead of against them.

When you understand the foundations Matt teaches, soil improvement stops feeling overwhelming and starts feeling doable. And once your soil is healthier, everything you plant has a better chance of thriving.

Systems Over Guesswork: Why Structure Creates Ease

Here’s what most gardeners do without realizing it:

You buy seeds because they look interesting. You plant them wherever there’s space. You water when you remember. You fertilize when something looks off. It’s not a bad approach. It’s just exhausting.

Why do home gardens fail? Random planting leads to random results. And random results lead to frustration.

Gardeners who feel calm and confident in their gardens use simple, repeatable systems. They know what to plant when. They know how much space each crop needs. They know which plants support each other and which ones compete.

This doesn’t mean rigid rules. It means having a framework that reduces decisions and increases consistency.

What a Simple Garden System Looks Like

A basic system includes a planting calendar based on your climate, crop spacing guidelines, succession planting schedules, and companion planting basics. But knowing these elements exist is different from knowing how to implement them in your specific garden.

During the Superfood Garden Summit, Charles Dowding—one of the world’s leading no-dig gardening experts—shares his systematic approach in No-Dig Gardening for a More Nutritious Homegrown Harvest. Charles has been refining his method for over 40 years, and his system reduces weeding by 90% while producing healthier, more nutrient-dense food.

He’ll show you:

• How to set up a no-dig garden bed from scratch (even if you’re starting with lawn or compacted soil)

• The exact mulching and composting schedule that suppresses weeds naturally

• Why undisturbed soil produces more nutritious vegetables (the science is fascinating)

Charles’s approach takes the guesswork out of when to plant, what to feed your soil, and how to keep your garden productive without constant intervention. When you follow a proven system like his, you stop guessing and start seeing patterns that help you improve each season.

Prevent Problems Before They Start

Why do some gardeners rarely deal with pests or disease while others battle problems every week?

The difference isn’t luck—it’s prevention. Most gardening advice focuses on reactive solutions: Your plants have aphids? Spray them. Your tomatoes have blight? Remove the affected leaves. Your soil is dry? Water more.

But gardens with healthy soil and proper plant spacing naturally resist common pests and diseases because strong plants send different chemical signals than stressed ones. Prevention is always easier than fighting problems after they start.

Early decisions impact everything that happens in your garden. How you prepare your soil, how you space your plants, and how you support biodiversity all determine whether problems show up in the first place.

Simple Prevention Strategies That Work

Healthy soil creates pest-resistant plants. Plants grown in living, nutrient-rich soil are naturally more resistant to pests and disease because they develop stronger cell walls and immune responses. Weak plants send out chemical signals that attract insects looking for an easy meal.

Give plants enough space. Crowding reduces airflow, which creates the damp conditions fungal diseases love. Proper spacing also means each plant gets the nutrients and light it needs to stay strong.

Invite beneficial insects early. Plant flowers and herbs that attract pollinators and predatory insects. Ladybugs, lacewings, and parasitic wasps help control pests naturally. When they arrive before the pests do, they keep populations in check without you lifting a finger.

These steps take less time than battling problems all season. And they create a garden that works with you instead of against you.

Make It Simple (So You Actually Enjoy Gardening)

What’s the easiest way to start a vegetable garden without feeling overwhelmed?

The biggest mistake new gardeners make is trying to do too much at once. You plant 15 different crops. You try three new techniques. You follow advice from five different sources.

And then you feel overwhelmed before the first harvest even arrives.

Starting small builds confidence. It gives you time to learn what works in your specific garden. And it keeps gardening from feeling like a second job.

How to Simplify Your Garden This Season

• Choose 3-5 crops you actually want to eat. Focus on growing those well instead of growing everything poorly.

• Pick one new skill to practice this season. Maybe it’s improving your soil. Maybe it’s learning to succession plant. Maybe it’s watering more efficiently.

• Speaking of watering—this is where many gardeners waste hours and still end up with inconsistent results.

During the Superfood Garden Summit, Greg Peterson and Janis Norton reveal The Most Revolutionary Way to Water Your Garden, a method that reduces water waste, saves time, and actually helps plants thrive better than traditional watering approaches.

They’ll share how to set up a simple system that waters your garden for you (no expensive equipment required). Their approach transforms watering from a daily chore into a simple system that works on autopilot.

Give yourself permission to learn as you go. Every gardener kills plants. Every gardener makes mistakes. That’s how you figure out what works in your garden. Gardening gets easier when you stop trying to be perfect and start building systems that support you.

Learn the Foundations That Make Gardening Easier

If you’re realizing that you’ve been missing some of these foundational pieces, you’re not alone.

Most gardeners figure this out the hard way, through trial and error across multiple seasons.

But you don’t have to spend years struggling to piece it together on your own.

The Superfood Garden Summit is a free event where garden experts break down these exact foundations step by step. You’ll learn how to build healthy soil, create simple systems, prevent common problems, and grow food that actually thrives.

The experts teach in a way that makes sense, without jargon or overwhelm. And everything they share is designed to help you feel confident and clear about what to do next in your garden.

If you’ve been feeling like gardening is harder than it should be, this summit will show you why and give you practical ways to make it easier.

Superfood Garden Summit

Build Your Foundation This Season

Gardening gets easier when you stop guessing and start working with proven foundations.

Not because you suddenly develop a green thumb, but because you understand how soil, plants, and prevention work together to create a garden that thrives with less effort.

The gardeners who make it look effortless? They’re using the same foundations you just read about—soil health, simple systems, prevention, and focused simplicity.

And they learned these foundations the same way you can: from gardeners who’ve done the trial and error so you don’t have to.

The Superfood Garden Summit brings together expert gardeners who will walk you through exactly how to build these foundations in your own garden—no matter where you’re starting from or how many seasons you’ve struggled.

You’ll get the step-by-step systems that make gardening feel easier. The prevention strategies that save you hours of troubleshooting. And the confidence that comes from knowing exactly what to do next.

Register free for the Superfood Garden Summit and learn the foundations that turn struggling gardens into thriving ones.

Because gardening should feel like a relationship with nature that grows stronger every season—not a battle you’re constantly losing.
Should You Separate Seedlings Before Planting? Here’s How to Decide with Confidence

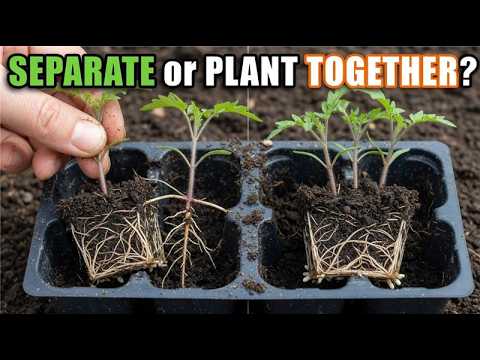
You’re looking at a six-pack of tomato seedlings. Two stems in one cell. The label doesn’t say whether to separate them or plant them together. And you’re wondering: which choice gives these plants the best chance to thrive?

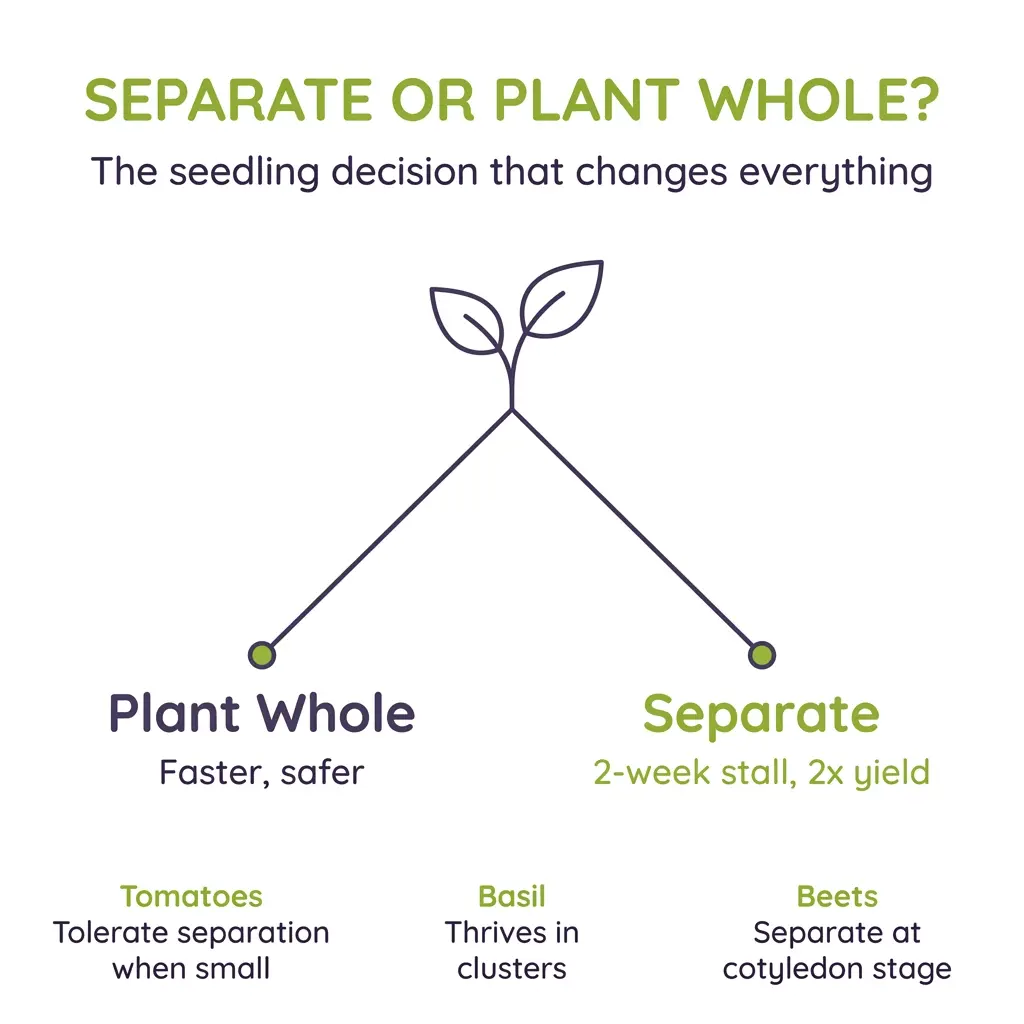
The answer depends on two factors: stem spacing and plant size. If seedlings are small with stems a couple inches apart, you can separate them—expect a two-week growth pause while roots rebuild, then both plants will thrive. If stems are pressed together or plants are large, keep them together to avoid damaging the roots at the base.

It’s a question that comes up again and again—with beets clustered in trays, basil bunched together, squash seedlings sharing space. You want to do right by your plants, but the guidance out there is frustratingly vague.

Here’s what most gardeners don’t realize: when you separate seedlings, you’re not just pulling apart stems—you’re severing roots. Understanding what happens during that recovery process helps you decide when the trade-off is worth it.
This isn’t about following rigid rules. It’s about understanding how your plants grow so you can make confident choices that set them up for success. And that knowledge? It transforms everything.

Watch the Training Video: Knowing when to separate and when to leave seedlings together makes all the difference. This article covers the key decision points, but the video shows you the specific techniques in action so you can see exactly how it’s done.

What Happens Underground When You Separate Seedlings

When you gently separate seedlings, you’re giving each plant its own space to develop strong roots. But here’s what’s important to understand: you’re also damaging some of those roots in the process.

For about two weeks after transplanting, your separated seedlings will pause their visible growth. They’ll stay the same size above ground while they rebuild their root structure below to match the size of the plant.

This is completely normal! But if you don’t expect it, you might worry something’s wrong. Knowing this pause is part of the process helps you relax and let your plants do their work underground.

Here’s the trade-off you’re making: Would you rather have one plant that takes off right away? Or two plants that pause for two weeks, then both grow vigorously?

If your seedlings are about the size shown in the video (small, with stems a couple inches apart) and both plants look healthy, separation gives you two strong plants for the price of one six-pack cell. That two-week pause is your plants rebuilding—and then they take off.

How to Decide: Separate or Plant Together?

The decision comes down to stem spacing, plant size, and plant health. Here’s the framework:

Separate seedlings when:

• Stems are a couple inches apart (not pressed together)
• Plants are small (like the size shown in the video)
• Both plants look healthy
• You’re willing to accept a two-week growth pause

Keep seedlings together when:

• Stems are pressed right against each other
• Plants are larger than typical transplant size
• Roots are severely intertwined at the base

Tomatoes: Check Stem Spacing First

Small tomato seedlings with stems a couple inches apart can be separated successfully. You can literally take your fingers, put half on one side and half on the other, and slowly rip the roots apart. Or if you’re not comfortable with that, cut them apart with a knife.

If stems are pressed right against each other, don’t separate them. The roots around the base are so intertwined that you’ll likely damage both plants. Instead, plant the whole root ball, watch for a week or two to see which stem grows most vigorously, then cut the other one down to the soil.

Plant-Specific Guidelines: Beets, Basil, Cucumbers, and Squash

Beets: Timing Is Everything

Beets are one of the few plants where you want to transplant when they’re really small—at the cotyledon stage, when you can just barely see the first true leaves starting to grow. At this stage, the roots are tiny and you can very gently tease them apart. The key is timing—transplant early before the roots get tangled.

Beets are root vegetables, so they don’t like their roots moved around too much. But they’re one of the few vegetables that doesn’t mind being transplanted if you catch them small enough.

Basil: Plant in Clusters, Not Singles

Basil thrives in clusters. When you plant basil six inches apart, use three to five stems in each spot. Don’t plant just one stem of basil—it produces better when stems support each other.

Cucumbers and Squash: Space for Airflow

Cucumbers and squash are often sold with two or three stems in one cell. If you have a single stem, you might plant cucumbers about 12 inches apart. But when you have multiple stems in the same cell, open up your spacing to 18 inches to allow those vines room to grow with good airflow.

Why does airflow matter? Cucumbers most often get powdery mildew—a fungal disease that gets worse with less airflow. The more you pack them in, the more likely you are to get this problem. If you start seeing powdery mildew later, don’t be afraid to cut one vine down if needed.

How to Handle Rootbound Seedlings

Sometimes you end up with seedlings that are rootbound—roots all tied up in circles with nowhere to go. It’s not ideal when buying seedlings, but if you have them, the X-cut method works reliably:

1. Slice an X on the bottom of the root ball
2. Cut through one side, then at a 90-degree angle, cut into the other side
3. You’ll have four quarters along the bottom where the root system is
4. Spread those root systems wide—pull them apart into four corners

This allows the root system to grow outward. If you don’t do this and just plant it as-is, the roots stay circling and you don’t know where the ends are. You want those ends facing out.

Yes, you’ll see a couple weeks of slow growth while they rebound. But this technique works—you’re unlikely to lose a plant. It just takes those couple of weeks to recover.

Three Plants That Need to Stay Together

Bunching Onions

Bunching onions actually need each other to stand upright and stay vertical. That’s why they’re called bunching onions—they’re grown in bunches. Plant six to eight seeds per cell, then transplant the whole thing together.

Parsley and Cilantro

When herbs like parsley or cilantro are really hard to separate out, it’s fine to just plant two together if they end up in the same cell.

The Two-Week Growth Pause: What to Expect

Here’s what to expect after you separate seedlings: for about two weeks, your plants will pause their visible growth. They’ll stay the same size above ground while they rebuild their root structure below to match the size of the plant.

This is completely normal. You’re not doing anything wrong. The plant is doing exactly what it needs to do. Once that root regrowth is complete, both plants will grow vigorously.

You’re unlikely to lose a plant from proper separation. It just takes those couple of weeks to recover.

Building Confidence Through Understanding

When you know what’s happening underground—how long recovery takes, which plants handle separation well, when stems are too close together to risk it—you stop guessing and start making informed decisions.

That’s the difference between gardening by trial-and-error and gardening with understanding. And that understanding? It builds your confidence season after season.

The training video shows you these techniques in action—how to gently separate roots, when to use the X-cut method for rootbound plants, and the visual cues that tell you whether seedlings are healthy enough to handle separation. It’s practical guidance you can use right away.

Ready to see how it’s done? Watch the video and discover how to handle seedlings with confidence, giving each plant the best chance to thrive in your garden.

Why Grow Your Own Food? (It’s Not Just About the Vegetables)

Most people think gardening is about growing vegetables. But ask experienced gardeners why they really do it, and you’ll hear something different.

They talk about joy … watching a tiny seed become food on their plate. About connection … to seasons, to their own capability, to something deeper than their daily routine. About unexpected fun … the thrill of the first tomato, laughing at squirrel raids, sharing seedlings with neighbors. And about freedom … knowing they’re not completely dependent on grocery stores, having real agency over what they eat.

Gardening addresses something beyond hunger. It fills emotional and spiritual needs many people didn’t even realize they had.

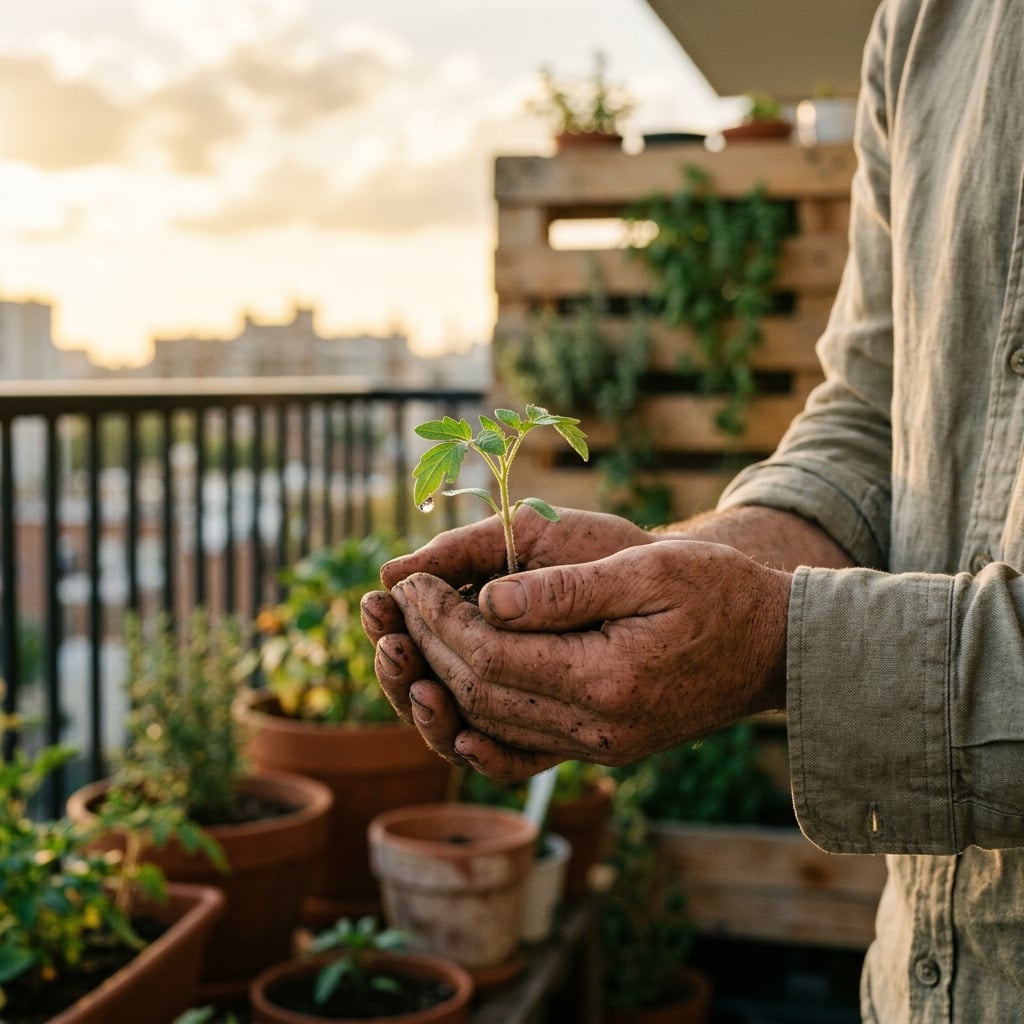
Person holding a seedling on a balcony garden

But here’s what stops most people before they start:

“I don’t have time.”
“I don’t have space.”
“My conditions aren’t right—bad soil, wrong climate, too much shade.”

These concerns feel real. And they are valid. But here’s what thousands of gardeners with the exact same limitations discovered: the deeper rewards of gardening made finding solutions feel worth it.

When you understand what gardening truly gives you, beyond the vegetables, your constraints start to matter less than the experience you’re creating.

What Gardening Really Gives You

Joy: Moments That Quiet Everything Else

There’s something profound about putting a seed in soil and watching it become food. It’s not just accomplishment … it’s witnessing a small miracle you helped create.

Gardeners talk about those few quiet minutes with their hands in dirt that somehow calm mental noise in a way meditation apps never could. The simple pleasure of picking a sun-warmed tomato and eating it right there in the garden. Watching butterflies visit flowers you planted.

These moments of joy aren’t extra, they’re often what people need most but didn’t know they were missing.

Connection: To Something Bigger Than Your Routine

Gardening connects you to the rhythm of seasons in a tangible way. You’re not just watching spring happen, you’re participating in it. Planting seeds. Watching growth. Harvesting.

It connects you to where your food actually comes from. And to your own capability. When you eat a tomato you grew from a seed, there’s this quiet moment of realizing: “I did this. I’m more capable than I thought.”

That sense of connection, to nature, to your food, to your own resilience, changes something fundamental.

Fun: The Unexpected Delight of It All

Gardening has this way of being playful, even when you’re “working.” The thrill when you spot the first tomato forming. Laughing when squirrels stage an elaborate heist of your cherry tomatoes. Experimenting with a new variety just because the seed packet made you curious.

Sharing seedlings with neighbors who become gardening friends. Sending photos of your harvest to family members. The goofy pride of growing something ridiculously large or unusually shaped.

It’s fun in a way that feeds something deeper than entertainment.

Freedom: Real Agency Over Your Food

There’s quiet power in knowing you’re not completely dependent on whatever the grocery store decides to stock or charge. When you grow even a portion of your own food, you have real agency.

You choose what to grow. How it’s grown. When to harvest it. You’re not at the mercy of supply chains or inflation or mysterious shortages.

That sense of self-reliance (even if it’s just a few meals a week from your garden) changes how you see yourself in the world. You become someone who creates, not just consumes. Someone with skills that matter.

But What About Time, Space, and Conditions?

These deeper rewards sound beautiful. But you’re still wondering: “How do I actually make this work with my limitations?”
We are here to help you discover your personal “why” for growing food—because here’s what’s powerful about that: when you’re clear on what gardening gives you emotionally and spiritually, you naturally find ways to make it work with what you have.

You start seeing your small balcony as enough. Your busy schedule has pockets of time you want to spend outside. Your clay soil becomes a challenge you’re curious to solve, not a reason to quit.

Why Do Many Gardeners Quit Before They Get Started

These are the most common reasons and we want to address them head on, but from a supportive angle:

Time: You don’t need more time … you need to discover what makes those minutes in the garden worth protecting in your schedule. The training helps you see gardening not as another obligation, but as something that fills you up.

One student put it this way: “I kept saying I didn’t have time to garden. Then I realized I was spending 30 minutes a day scrolling on my phone. I didn’t need more time, I needed something I actually wanted to spend time on. Gardening gave me that.”

Space: You don’t need acres. The training shows you what’s genuinely possible in small spaces … raised beds, containers, vertical growing. It’s more than you think.

Conditions: You don’t need perfect soil or climate. The training supports you in understanding how to work with your specific situation. Your limitations become simply part of your unique gardening journey.

Where Do You Get Started in Your Garden

Instead of overwhelming you with instructions on what to plant or how to build a bed, we like to start with something more foundational.

When you understand what draws people to gardening … not the harvest itself, but the way gardening makes them feel … something shifts. Your constraints become less intimidating. The path forward becomes clearer.

Start With Your Why

You don’t need more time, more space, or better conditions to discover why growing food might transform your life.

We’d like to invite you to join us for the Green Thumb Essentials online training and discover the deeper reasons people grow food, and how those reasons make your current limitations feel much less limiting.

This training will help you see gardening not as another task to accomplish, but as something that fills emotional and spiritual needs you might not have even named yet.

Your challenges are simply your starting point. The training shows you what’s possible from exactly where you are … and why it’s worth beginning.

Green Thumb Essentials

Why Growing Your Own Vegetables Makes You Eat More of Them (And Live Healthier)

Quick Answer: People who grow vegetables eat more vegetables, and people who eat more vegetables live longer, healthier, and happier lives. According to Ocean Robbins, CEO of Food Revolution Network, homegrown vegetables taste dramatically better because they’re fresher, moister, and sweeter than store-bought varieties bred for shipping—not flavor. When vegetables taste this good, eating more of them becomes natural, not forced.

In a study from Rush University in Chicago, people who ate greens daily had 11 more years of healthy brain function. That means if they were going to get Alzheimer’s, it happened 11 years later on average, a profound impact when half of people over 85 in the U.S. have Alzheimer’s or another form of dementia.

The secret? Growing vegetables creates a connection that makes eating them feel joyful rather than obligatory. Here’s why homegrown vegetables naturally make you want to eat more of them.

How Do Homegrown Vegetables Compare to Store-Bought?

The difference between homegrown and store-bought vegetables comes down to breeding priorities and freshness.

Store-bought vegetables are bred for:

• Long shelf life (months of storage)
Shipping durability
Uniform appearance
Dried-out texture that prevents spoilage

Homegrown vegetables are:

• Moister and more succulent
Sweeter in flavor
Harvested at peak ripeness
Varieties bred for taste, not transportation

Peak timing matters: Peas are sweetest right at harvest—”their sugars start to turn into starches the longer after harvest,” Ocean notes. Greens on the plant “last much, much longer” than store-bought and have “no degradation.”

This taste difference fundamentally changes how much you want to eat vegetables. When food tastes this good, eating more becomes effortless.

Easiest Vegetables to Grow (And Why They’re Nutritional Stars)

Onions: Easy to grow, pest-resistant, full of cancer-fighting sulfur compounds

Kale, Collards, Cabbage, Bok Choy: “Absolute superstars from a nutrient density perspective,” easy to grow, kale gets super sweet after frost

Peas: Grow super fast, fix nitrogen in soil, loaded with antioxidants and eyesight-supporting compounds

Potatoes: Thousands of varieties in every color and flavor—stores only carry a handful

Tomatoes: Heirloom varieties are “so soft and juicy and delicious, like just creamy”—too delicate for stores

Special Crop You Can Only Grow Yourself

Mulberries: “So sweet and succulent, and the flavor is so intense,” but too soft to ship. Bonus: they are hardy trees that need little water.

The Evidence: Gardeners Eat More Vegetables and Live Healthier

“Studies show that people who grow vegetables eat more vegetables, and people who eat more vegetables live longer, live healthier, and live happier,” Ocean states.

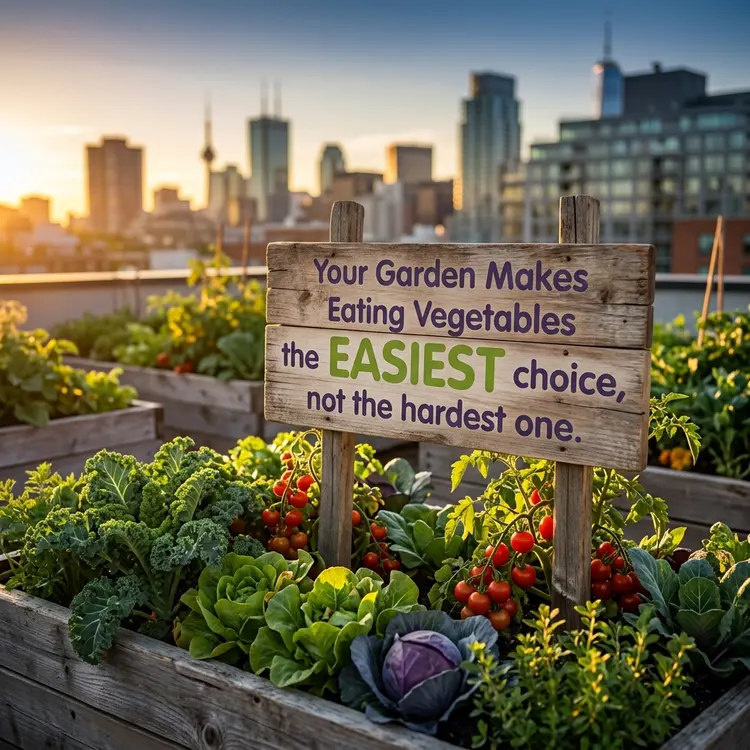
Your Garden Makes Eating Vegetables the easiest choice not the hardest one

The mechanism is simple: constant access to fresh, delicious vegetables makes eating them the easiest choice. “Being able to walk out and there are greens right there all the time—it’s kind of amazing,” Ocean shares.

The health impact is profound:

11 more years of healthy brain function for people who ate greens daily (Rush University study)
Better mental function and lower Alzheimer’s rates for berry eaters—berries are “loaded with anthocyanins, antioxidants, flavonoids” that fight cancer and promote brain health

Why the Connection Matters

“Gardening can give us a sense of roots, a sense of connection to the rhythms of soil and sun and rain and earth,” Ocean explains. “There’s nothing more grounding than playing in the dirt.”

This connection transforms vegetables from obligation into joy. When you’ve nurtured food from seed to plate, eating it becomes an act of satisfaction—not a chore.

What Makes Food “Super”?

Ocean redefines superfoods: “What makes a food super is that it’s super affordable, super nutritious, and can do a super large amount of good for a super lot of people. That comes back to the stuff we can grow in abundance.”

The Bottom Line

If you’re ready to feel more confident about what you’re putting on your plate—and why—it starts with learning from voices you can trust.

That’s exactly what you’ll find inside the 2026 Food Revolution Summit Docuseries: The Science of Food and Wellness. Across eight powerful episodes, 41 of the world’s top doctors, scientists, and nutrition experts share the latest research and practical insights to help you make informed choices for your health.

And if you’re wondering where to begin, start simple.

Our friends at Food Revolution Network have created a brand-new, free guide that shows you a fun and easy way to eat more plants—without overthinking it. You’ll learn how to add more color (and nutrients!) to your meals, plus get five delicious recipes you can try right away.

Download The Guide to Eating More Plants and take your next step toward vibrant, nourishing food.
Here’s to growing, choosing, and enjoying food that truly supports your well-being 🌱

How to Grow $400 of Vegetables in 40 Days: The 5-Ingredient Recipe

You can grow $400+ worth of vegetables and herbs in just 40 days using only 100 square feet of space (or less) and following a 5-ingredient recipe. Stacey Murphy, who has taught thousands of gardeners worldwide, grew $420 worth of produce in 40 days with an initial investment of just $128, and it required only minutes of daily maintenance.

Key Facts at a Glance:

• Time frame: 40 days from planting to harvest
Space needed: 100 square feet or less (Stacey used only 36 square feet)
Value produced: $420 worth of vegetables and herbs
Initial investment: $128 for supplies
Daily time commitment: Just minutes per day for watering and checking plants
Setup time: 2 hours for supplies + 8 hours to build beds (if starting from scratch)
Best starter crops: Greens, herbs, and root vegetables (21-40 days to harvest)

Watch the video below to see Stacey’s complete 40-day challenge, from building the beds to the final harvest.

The Complete 5-Ingredient Recipe

To prove what’s possible, Stacey took the 40-day challenge, creating a brand new garden from scratch and tracking every detail. The result? $420 worth of vegetables and herbs in 40 days.

Here’s the complete recipe broken down into five essential ingredients:

Ingredient #1: Find 100 Square Feet or Less

That’s about 10 square meters if you’re on the metric system. For Stacey, this looked like two boxes, each three feet by six feet. Notice that’s only 36 square feet of planting space … smaller than most people’s dining room tables.

Ingredient #2: Six to Eight Hours of Sun Each Day

Healthy plants photosynthesize. That’s how they grow. They can’t do it without sunlight.

On a sunny day, go outside and check your potential growing space every hour. Tally up how many hours receive direct sun. Hopefully, it’s between six and eight hours—but Stacey completed her challenge with just five to six hours of winter sunlight, and her greens still thrived.

Many greens tolerate partial shade better than other vegetables, making them ideal for less-than-perfect growing conditions.

Ingredient #3: Your Temperatures Determine Your Crops

You don’t fight nature. You work with it.

When Stacey did her challenge, it was winter in a temperate climate. Daytime temperatures ranged from 55°F to 70°F. She didn’t want to chance it, so she stuck with cooler weather crops.

She grew radishes, turnips, beets, carrots, chard, kale, and collards. She grew herbs. She grew cabbage. She grew some peas. That’s where she stuck because her temperatures were what they were.

Here’s where greens become your strategic advantage: There’s a green for every season. Cool-weather greens like chard, kale, collards, spinach, and lettuce thrive in spring, fall, and winter. In summer heat, switch to heat-tolerant varieties like Swiss chard, amaranth greens, and New Zealand spinach. Match your varieties to your climate, and you’ll have fresh greens 12 months a year.

Ingredient #4: Build Soil for Long-Term Success

While Stacey focused on a 40-day challenge, she wanted her boxes to remain fertile for seasons to come. Here’s what she used to build a new three-foot by six-foot raised bed:

Three untreated 2×12 boards (sides six feet long, ends three feet long, cut at the store)
Deck screws (3.5 inches long, two per corner)
12 cubic feet of garden soil (about three bags with topsoil and compost, OMRI-listed for organic assurance)
4 cubic feet of compost (homemade or purchased with OMRI listing)
12 trowel-fulls of worm castings (adds beneficial bacteria and promotes soil biology)
12 tablespoons of rock dust (optional—ensures full spectrum of nutrients from volcanic rock)

Mix ingredients together, transplant or direct seed crops, and water everything in.

Ingredient #5: Put the Plants in Your Daily Path

You’re actually the fifth ingredient. You have to be committed to this gardening habit.

Stacey placed her beds in her daily line of sight—outside her desk window and near her outdoor lunch table. For indoor shoots, she set up trays with grow lights next to her bed.

The fifth ingredient? Water. Vegetables and herbs need water—it’s what moves nutrients through the plants. Stacey didn’t install a drip irrigation system. She just hand-watered each day, sometimes every other day. There was a lot of rain in the winter, so she didn’t have to water every day. It took her a couple of minutes each morning. That’s the commitment. Just minutes each day for watering.

The Results: $420 Worth of Groceries in 40 Days

In the first 40 days, Stacey grew approximately $420 worth of groceries—vegetables and herbs including radishes, turnips, beets, carrots, chard, kale, collards, herbs, cabbage, peas, and microgreens.

Her investment was just $128 for all supplies. Your investment will vary depending on where you are and what you already have in place. Net result? $292 worth of groceries after the initial investment.

The next 40 days? Just seed costs. Grow the same crops again for $402 in net value—incredible returns.

And here’s where greens shine: Many are cut-and-come-again crops. Plant once, harvest for weeks or even months. Chard, kale, and collards kept producing long after that first 40 days. When you start with greens, you build confidence, you build skills, and you build a foundation for expanding into other crops.

The Time Investment: It’s Easier Than You Think

People always ask about time. Here’s the honest breakdown:

Setup week: Stacey spent a couple of hours that first week buying all her supplies and setting up. If she had those two beds to build from scratch, it would’ve taken another eight hours total (based on the time she spent building a new box later).
Daily indoor care: About one minute when she woke up and one minute when she went to bed spritzing her indoor shoots
Weekly outdoor care: About an hour each week harvesting, watering, and checking on the plants

Setup takes the most time, but once complete, maintenance requires just minutes per day.

Frequently Asked Questions

How much space do you need to grow $400 worth of vegetables?

You need 100 square feet or less. Stacey used just 36 square feet (two raised beds measuring 3 feet by 6 feet each) plus two small shelves for indoor microgreens.

How much time does it take to maintain a 40-day garden?

After setup (2 hours for supplies, 8 hours to build beds if needed), maintenance requires just minutes daily for watering plus about 1 hour weekly for harvesting and checking plants.

What crops grow fastest in a 40-day garden?

Greens, herbs, and root vegetables mature fastest—within 21-40 days. Radishes, turnips, beets, carrots, chard, kale, collards, lettuce, spinach, and microgreens all deliver quick harvests.

How much does it cost to start a 40-day garden?

Stacey’s initial investment was $128 for lumber, soil, compost, seeds, and amendments. Costs drop to just seed purchases after the first cycle.

Can beginners really grow $400 of food in 40 days?

Stacey has experience and grew $420. Beginners typically produce less initially but improve dramatically by their second cycle. Many first-time students have grown hundreds of dollars of produce.

What temperature do you need for a 40-day garden?

Cool-weather crops (greens, roots, brassicas) thrive in 45-70°F. Warm-weather crops need consistent 50°F+ nights and 70°F+ days. Match crops to your climate.

Why start with greens instead of other vegetables?

Greens deliver the fastest results (21-40 days), tolerate partial shade, provide cut-and-come-again harvests for months, and grow year-round with proper variety selection.

Where to Start: Why Greens Are Your Best First Step

You now have the complete 5-ingredient recipe: space (100 sq ft or less), sun (6-8 hours), temperature-matched crops, quality soil, proper placement, and consistent water.

Start with greens. They’re fast (21-40 days), forgiving, and phenomenally productive. While pumpkins take 90 days and tomatoes need 55+, greens deliver fresh harvests quickly.

In just minutes each day—the same time you spend standing in line at the market—you could grow nutrient-dense, organic greens at home.

Ready to grow your own greens? Download our free guide: The Complete Guide to Growing Your Own Greens. You’ll discover which greens to plant for your season, how much space you need, and the simple daily routine that produces fresh greens for every meal.

Get your free greens growing guide here and start growing today.

Free Video & Guide_Grow Your Own Greens

Four Types of Garden Hacks to Solve Any Problem (Including Lost Tools)

Garden hacks are tools, techniques, or strategies that make gardening easier by simplifying processes. There are four types of garden hacks you can use to solve any gardening problem: physical solutions you can purchase, do-it-yourself solutions, mindset shifts, and strategic backup systems.

These four hack types work using a problem nearly every gardener faces: losing handheld tools in the garden. You put down your pruners to free your hands, then can’t remember where you left them. It’s a time waster that keeps you from actually growing food.

The key insight? Losing tools isn’t about being forgetful—it’s about not having the right systems in place to work with how you naturally move through your garden. By applying all four hack types to any problem, you create solutions that actually stick.

Watch Stacey Murphy explain the four types of garden hacks:

YouTube video player

What Are the Four Types of Garden Hacks?

These four types of garden hacks approach problems from a different angle:

1. Buy Physical Solutions – Ready-made tools or products you buy off the shelf
2. Do-It-Yourself Solutions – Items you make yourself from materials you already have
3. Mindset Shifts – Behavior changes that become automatic habits
4. Strategic Backup Systems – Strategies that work even when you forget to follow through

Here’s how each type solves the lost-tool problem:

Type 1: Physical Solutions You Can Purchase

The first hack type involves buying a tool or product that solves your problem. For lost tools, you can buy a tool caddy… a container that travels with you and provides a designated spot for everything you’re using.

Many gardeners like caddies because they can take their tools inside at the end of the day, protecting them from the elements that cause rust. Some people may choose to leave their tools outside and not mind if they rust, but if you’re particular about your tools, a caddy makes bringing them in easy.

Type 2: Do-It-Yourself Solutions

The second hack type focuses on creating what you need from materials you already have rather than purchasing a solution.

For the lost-tool problem, you can make a tool belt, either using an actual tool belt you already have or utilizing the loops on your pants. This keeps tools attached to you as you move around the garden, so you’re never searching because everything travels with you.

Type 3: Mindset Shifts That Change Your Behavior

The third hack type is trickier because you’re changing your behavior. The key is making the new behavior as automatic as brushing your teeth.

For lost tools, create designated spots in every garden bed. Rather than putting tools down randomly, you establish specific locations. You can place weatherproof mailboxes in the four major places where you sit or stand to work. Now your tools will always be in one of those four locations.

You might have to look through each spot, but it saves effort compared to searching the entire garden. The key is making sure the designated spot is readily available since you’re putting tools down in the midst of working.

Type 4: Strategic Backup Systems That Work When You Forget

The fourth hack type is a strategy that works even when you do the wrong thing. Consider this “outsmarting yourself.”

A solution for lost tools involves painting tool handles twice:

1. Orange spray paint – Makes tools visible during the day against brown earth and green plants
2. Glow-in-the-dark paint – Makes tools glow for 2-4 hours after sunset

Now when you lose a tool, you can wait for the sun to go down and locate the glowing tool in the dark.

How to Apply the Four Hack Types to Any Garden Problem

You can apply these four hack types to any problem you’re facing in your garden. Here’s the process:

Step 1: Is there a tool available that you can purchase that’s easy and will solve your problem?

Step 2: Is there a do-it-yourself solution? Maybe you can make something yourself.

Step 3: Change your mindset. Figure out a new behavior to replace the old behavior. You have to come up with a creative solution that actually changes the behavior.

Step 4: Create a strategy so that even when the mindset fails, you have a backup plan.

Key Takeaway: The Four-Hack Framework

The four types of garden hacks give you multiple angles for approaching any challenge:

• Buy a physical solution if one exists
• Make a DIY version from what you have
• Change your habits to prevent the problem
• Create backup systems for when habits fail

Knowing these four types means you can solve any problem you face in your garden by systematically working through each approach until you find what works for your situation.

Learn More Garden Problem-Solving Strategies

If you’ve ever felt frustrated by tools going missing, you’re not alone… and the truth is, “lost tools” are just one small part of a bigger picture in the garden. From misplaced tools to pest issues, inconsistent watering, or plants that just aren’t thriving—every gardener runs into obstacles along the way. The key isn’t avoiding them completely… it’s knowing how to recognize and solve them quickly so you can get back to enjoying your garden.

That’s exactly why we created this free guide: Troubleshooting Garden Obstacles 🌱

Inside, you’ll find simple, practical ways to identify what’s going wrong (and what to do about it), so you can grow with more confidence, ease, and success—no matter where you’re starting.

How to Choose and Save Seeds

A Complete Guide to Building a Self-Sustaining Garden

Seeds Remember What You Forget

Quick Answer: Choosing the right seeds (heirloom and open-pollinated over hybrids) and learning to save them allows your garden to adapt to your specific climate and soil over time, creating more resilient plants that produce better harvests year after year.

Seed saving is simpler than most gardeners think – many plants just need to flower and dry before you collect their seeds.

We’ve all been there – carefully planning our planting schedules, perfecting our watering routines, battling pests with determination. But there’s a quieter, more joyful decision happening at the very beginning that can transform your garden into something truly magical: a space that becomes more resilient, more abundant, and more uniquely yours with each passing season.

That decision starts with seeds – and it’s simpler (and more rewarding) than you might think.

Greg Peterson, founder of UrbanFarm.org and co-founder of Great American Seed Up, lived at his Urban Farm property in Phoenix for 32 years, guided by one inspiring question: “What if there was a garden and fruit tree in every yard?” His work with local seed economies reveals something many of us overlook in our gardening journey. The seeds we choose don’t just determine this season’s harvest. They shape whether our gardens adapt to our unique soil, our specific climate, and yes – even our own hands – over time.

In this Thriving Gardener Masterclass, Greg explores how seeds can become the foundation of a garden that improves year after year – and we’re excited to share these insights with you. But here’s what the article alone can’t show you: the moment-to-moment decisions in Greg’s garden that turned decades of experience into practical wisdom, the tradeoffs he navigated, and the specific varieties that changed everything.

Watch the complete masterclass to discover:

• How seeds can help you grow food for your family and share with others
• Simple ways to let plants naturally reseed so your garden improves year after year
• Which open-pollinated varieties produce reliable, high-yield harvests in home gardens
• How shared seed resources expand what neighborhoods can grow together
• Why locally adapted seeds lead to better flavor, nutrition, and long-term garden success
• Practical ways to join seed sharing, swaps, and neighborhood growing networks

Ready to transform your garden? Register for the full masterclass here.

How Do Seeds Adapt to Your Local Garden Conditions?

Seeds adapt through selection over multiple seasons. When you save seeds from plants that thrived in your specific conditions, you’re selecting for traits that work in your unique space:

• The tomato that handled your summer heat
• The lettuce that didn’t bolt as quickly
• The basil that resisted your local pests

Over several seasons, these small selections compound into something beautiful. Seeds saved year after year can develop traits better suited to your unique growing environment, creating plants naturally more resilient to local conditions. We’ve heard from gardeners in our community who’ve experienced this transformation firsthand – it’s one of those “aha!” moments that makes you fall in love with gardening all over again.

Greg describes this as working with nature instead of against it – a philosophy we wholeheartedly embrace at GYOV. You’re not forcing plants to perform in conditions they weren’t bred for. You’re letting them adapt, and you’re adapting alongside them.

This approach also connects us to something bigger and deeply meaningful. When we save seeds from locally adapted plants, we’re preserving genetic diversity that protects against crop failure from pests or disease outbreaks. Every gardener who saves seeds becomes a guardian of biodiversity. That’s powerful.

How to Save Seeds: Easy Methods for Beginners

The biggest myth about seed saving is that it’s complicated. It’s not.

Dry-Processed Seeds (Easiest for Beginners):

Plants like lettuce, basil, arugula, cilantro, and dill simply need to flower and dry. The process:

1. Let the plant flower and go to seed
2. Wait for seed heads to dry completely
3. Collect seeds into a paper envelope
4. Label with plant name and date
5. Store in a cool, dry place

Wet-Processed Seeds (Slightly More Involved):

Plants like tomatoes, peppers, and cucumbers require wet processing. For tomatoes:

1. Scoop out seeds and surrounding gel
2. Let them ferment in water for 3-5 days
3. Rinse thoroughly
4. Dry seeds completely
5. Store in labeled envelopes

The fermentation removes the gel coating that inhibits germination – it’s nature’s way of preparing seeds for planting.

The real shift isn’t learning a new skill. It’s giving yourself permission to let a few plants go to seed instead of pulling them out. It’s changing how we see our gardens – not just as places of production, but as places of renewal and adaptation.

What Are Community Seed Banks and How Do They Work?

Community seed banks and seed libraries allow gardeners to share locally adapted varieties. Here’s how they strengthen local food systems:

How seed libraries work:

1. Gardeners contribute seeds from plants that did well in their area
2. Other gardeners borrow or take those seeds
3. They grow them and return seeds from their best plants
4. Over time, the collection becomes more adapted to local climate

Benefits of community seed sharing:

• Access to varieties already proven in your climate
• Preservation of genetic diversity
• Shared knowledge from experienced local gardeners
• Reduced cost – seeds are free or low-cost
• Community building around food resilience

Community seed banks harness local knowledge to support gardeners, conserve biodiversity, and help develop varieties adapted to local conditions. We’re not just growing food – we’re building resilience together.

Greg describes this as building a local seed economy, and it connects beautifully with what we believe at GYOV. It’s not just about access to seeds. It’s about creating a system where we support each other, share knowledge, and grow food that’s adapted to where we live. It’s gardening as community building.

Seed swaps work the same way, and they’re genuinely fun! Gardeners bring seeds they’ve saved and trade with others. You leave with new varieties to try (and new friends to make), and the seeds you brought go into someone else’s garden to begin their next chapter.

This kind of sharing expands what’s possible in our neighborhoods and communities. One gardener grows tomatoes well. Another has success with peppers. A third saves lettuce seeds every year. When we share, everyone benefits from varieties that have already proven they can thrive locally. We rise together!

Which Plants Naturally Reseed Themselves in Gardens?

Self-seeding plants that return year after year:

• Lettuce
• Arugula
• Cilantro
• Dill
• Basil (in warm climates)
• Nasturtiums

If you let a few plants go to seed, they’ll drop seeds that sprout the following season. This creates a self-sustaining cycle where the garden keeps giving with minimal intervention.

Why volunteer plants thrive: Plants that successfully reseed are already adapted to your garden’s specific conditions. Over time, you’ll notice these volunteers show up earlier, grow stronger, or resist pests better – that’s adaptation happening in real time.

Greg calls this “letting the garden teach you,” and we think that’s beautiful. You’re not controlling every variable. You’re observing what works and supporting it. You’re becoming a partner with your garden instead of just its manager.

This approach also reduces the work required to maintain your garden – always a win! Fewer seeds to buy. Fewer transplants to start. The garden fills in the gaps on its own, giving you more time to actually enjoy being out there.

How to Start Saving Seeds This Season: Step-by-Step Guide

For beginners, start with 1-2 easy plants.

Best plants for first-time seed savers:

• Lettuce
• Basil
• Cilantro
• Beans
• Peas

Simple seed saving process:

1. Let the plant flower and go to seed
2. Watch seed heads form and dry (this takes several weeks)
3. When fully dry and seeds are loose, collect them into a paper envelope
4. Label specifically: include plant name, variety, and date (example: “Buttercrunch lettuce from shady bed, August 2025”)
5. Store in a cool, dry place
6. Plant next season and observe performance
7. Save seeds again from the best-performing plants

That’s the entire process – and you absolutely can do this.

You don’t need to save seeds from every plant in your garden. You don’t need to master every technique at once. You just need to start small and build the habit, one seed packet at a time. Progress, not perfection!

Greg emphasizes this throughout the masterclass, and it’s something we remind our GYOV community of regularly: Seed saving isn’t about perfection. It’s about participation. Every seed you save is a step toward a garden that’s more adapted, more resilient, and more connected to where you live. It’s also a step toward food autonomy and deeper connection with how your food grows.

Do Locally Adapted Seeds Produce Better Flavor and Nutrition?

Yes. Here’s why local seeds often taste better:

Commercial seed priorities:

• Shelf life
• Uniform appearance
• Ability to survive shipping
• Flavor and nutrition are secondary

Heirloom and locally adapted seed priorities:

• Taste and texture
• Performance in specific growing conditions
• Nutrition
• Freshness (harvested at peak ripeness)

When we grow from locally adapted seeds, we’re prioritizing what truly matters to our families and communities. Flavor that makes you close your eyes and smile. Freshness you can taste in every bite. Nutrition that nourishes our bodies. Plants that thrive in our climate without excessive inputs. This is what gardening should be about!

Greg’s garden in Phoenix is living proof of this. Over decades, he’s grown abundant food in a climate most people assume is too hot for gardening. The key was choosing and adapting varieties that could handle the heat. If he can do it in Phoenix, imagine what’s possible in your garden!

The same principle applies wherever we garden. Seeds that adapt to your conditions produce better harvests with less effort – and more joy in the process.

How to Find Seed Swaps and Seed Libraries Near You

Where to connect with local seed savers:

• Public libraries (many host seed libraries)
• Community gardens
• Local gardening clubs
• Farmers markets
• Online seed networks and forums
• Organizations like Great American Seed Up

What you gain from seed networks:

• Access to rare varieties not in catalogs
• Local favorites already proven in your climate
• Knowledge from gardeners who’ve grown those varieties
• Community support and mentorship
• Collective wisdom that saves years of trial and error

Greg’s work with the Great American Seed Up focuses on making bulk seeds accessible to communities – removing barriers so more of us can participate. The organization provides education on seed saving, hosts events, and helps gardeners connect with local seed resources. It’s building infrastructure for food resilience, one community at a time.

When you join a seed network, you gain access to varieties you wouldn’t find in catalogs – rare treasures and local favorites. You also learn from gardeners who’ve already grown those varieties in your area, saving you years of trial and error. It’s collective wisdom in action!

This kind of community support makes gardening less isolating and more joyful. You’re not figuring everything out on your own in the backyard. You’re part of a vibrant system where knowledge, seeds, and experience flow between people who genuinely want to see each other succeed.

Greg describes this as building culture around seeds, and it resonates deeply with our mission at GYOV. It’s not just about the plants. It’s about the relationships that form when people grow food together, support each other’s learning, and celebrate harvests as a community.

What Greg Peterson’s Masterclass Reveals About Building Resilient Gardens

This article covers the foundation – seeds matter, adaptation happens over time, and sharing strengthens what we can grow together. But we’ve only scratched the surface of what Greg shares!

The full masterclass goes so much deeper, and we think you’re going to find it inspiring.

Greg talks about the concept of a local food economy, explaining how seeds fit into a larger system that includes local farmers, education, and culture. He shares generous stories from his years of urban farming, including what worked, what didn’t, and what he’d do differently. (We love when experienced gardeners share their failures – it’s how we all learn!)

You’ll learn which varieties produce reliable yields in home gardens and how to evaluate seeds for your specific conditions. Greg shares insights from decades of growing food in Phoenix, including lessons about letting plants adapt to their environment. You’ll come away with actionable strategies you can implement this season.

Most importantly, you’ll understand how to make seed saving a natural, joyful part of your gardening rhythm instead of an overwhelming new project. Greg makes it feel accessible, doable, and exciting – exactly how we approach teaching at GYOV.

Greg Peterson Thriving Gardener

The masterclass is where the partial insights in this article become a complete blueprint for garden transformation. If you’re ready to grow a garden that improves year after year – and connect with a community of gardeners who share your values – we’d love for you to watch the full conversation with Greg Peterson.

Register for the Thriving Gardener Masterclass and discover how seeds can transform your garden, your food autonomy, and your connection to the community around you. We can’t wait to see what you grow!

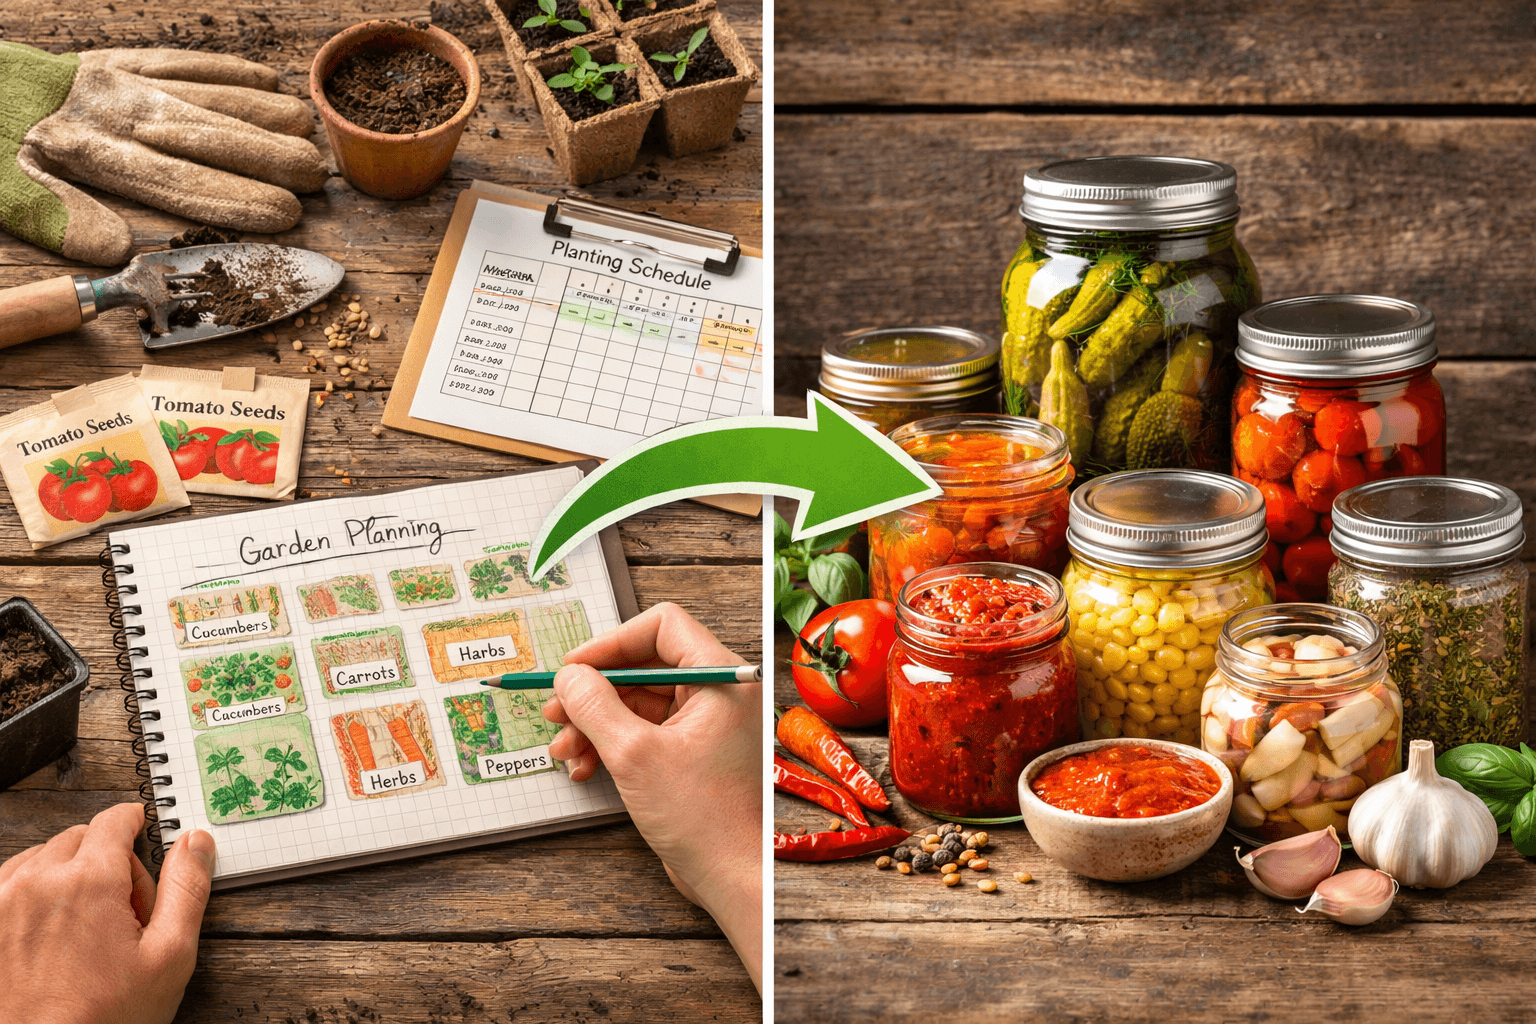
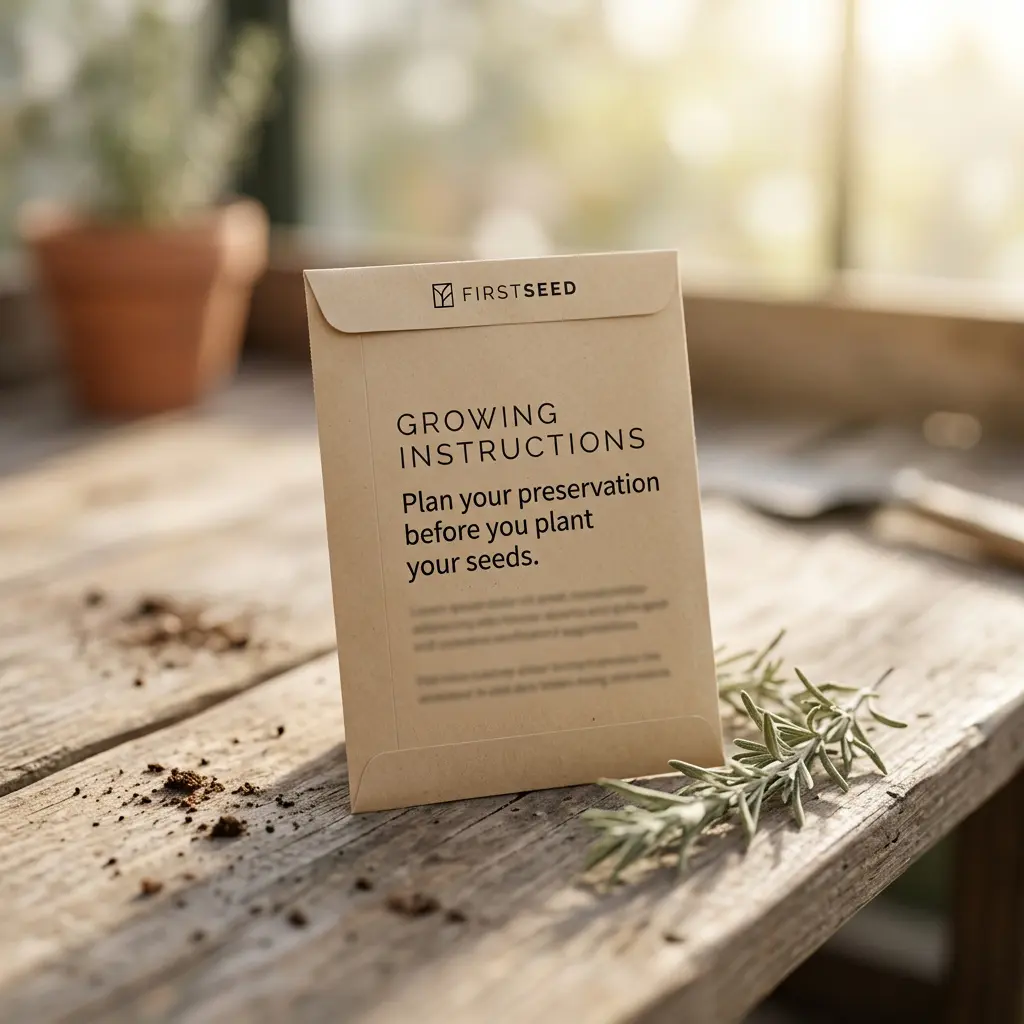
Why Plan Your Garden With Preservation in Mind?

Quick Answer: Planning your garden with preservation in mind means setting clear goals for what you want to eat year-round, tracking your harvest to learn how much each plant produces, and using that data to plan next year’s garden so you grow exactly what you need. This approach prevents harvest overwhelm and ensures your pantry stays stocked with homegrown food through winter.

Most gardeners plan what to grow based on what sounds exciting in seed catalogs. But gardeners who enjoy homegrown food year-round take a different approach … they plan their gardens around preservation goals before they plant a single seed.

This shift in planning transforms gardening from a summer hobby into a year-round food source. Here’s how to create a garden plan that feeds you beyond the growing season.

Want to see how this works in practice? The masterclass reveals this planning system experienced gardeners use to link their garden layout, harvest timing, and preservation goals into one seamless approach that eliminates guesswork and wasted produce.

What Does It Mean to Plan With Preservation in Mind?

Planning with preservation in mind means making three key decisions before spring planting:

First, identify your staples. What foods do you want available year-round? Maybe it’s tomato sauce for pasta nights, frozen green beans for quick sides, or dehydrated greens for smoothies. Start with three staples you’d genuinely use throughout winter.

Second, quantify your needs. How much of each staple do you actually eat? If you use one jar of tomato sauce weekly, you need approximately 30 jars to make it through the off-season (or 52 jars to make it through a whole year). This rate-based thinking helps you grow appropriate amounts.

Third, work backward to planting. Once you know you need 30 jars of sauce, you can calculate how many tomato plants to grow. Each paste tomato plant typically produces enough for 1-2 jars of sauce, so you’d need about 20-25 plants. Of course it depends on the type of tomato and other factors. Note how many jars of tomato sauce you get this season from X number of plants and plan from that next season.

This planning approach ensures you grow with purpose rather than hope.

How Do You Track Your Garden for Better Planning?

Creating an effective garden plan requires data from your current growing season. A simple harvest log transforms guesswork into informed decisions.

Record three things weekly: What you harvested, how much, and when. Even rough estimates help. “Five bunches of kale this week” or “first tomatoes arrived July 15th” creates useful patterns.

After one season of tracking, you’ll understand your garden’s rhythm. You’ll know when different crops peak, how productive each plant is, and where gaps exist in your harvest. This information becomes the foundation for next year’s preservation-focused garden plan.

One gardener tracking her harvest discovered she was growing $582 worth of produce in just over a month. The harvest log revealed she was averaging eight pounds of fresh greens weekly … enough to dehydrate for year-round green powders plus fresh eating.

What Is a Future Harvest Plan?

A future harvest plan connects your preservation goals to actual garden beds. It answers the question: “How many plants do I need to grow to preserve what I want to eat?”

Here’s how rate-based planning works: Let’s say you want dehydrated green powder for smoothies each day through winter. One bunch of greens (about 10 leaves) dehydrates into 1-2 tablespoons of powder. If winter lasts 150 days and you want one tablespoon daily, you need 75-150 bunches total. If your growing season runs 25 weeks, harvesting and preserving five bunches weekly gets you there.

This mathematical approach takes the guesswork out of garden planning. You’re no longer wondering “Did I plant enough?” You know exactly what you need to grow.

Your future harvest plan includes: Which staples you’re growing for preservation, expected harvest per plant (research or your harvest log data), total plants needed to meet your goals, and when you’ll harvest and preserve throughout the season.

How Does Preservation Planning Change What You Grow?

When you plan with preservation in mind, you make different choices about varieties, quantities, and timing.

You choose varieties that preserve well. Paste tomatoes for sauce instead of slicing tomatoes. Winter squash varieties that cure and store for months. Herbs that dry beautifully rather than lose flavor.

You grow larger quantities of fewer crops. Instead of one plant each of 20 tomato varieties, you might grow 25 plants of three preservation-focused varieties. This creates the volume needed for meaningful preservation without overwhelming diversity.

You consider storage without processing. Some crops (winter squash, onions, garlic, potatoes, beets, carrots) store for months after curing without any processing. These become garden staples because they provide maximum return for minimal preservation effort.

Why Start With Just Three Staples?

The temptation when planning a preservation garden is to preserve everything. Resist this urge.

Start with three foods you genuinely love and eat regularly. Master growing them in the quantities you need. Learn to preserve them efficiently. Build your skills and confidence with crops that matter to you.

Next season, add one or two more staples. Gradually, you’ll develop a garden that reliably produces the preserved foods your household actually uses.

This incremental approach prevents the overwhelm that stops many gardeners from preserving altogether. Three staples done well beats 20 crops that go to waste before you have a plan for preserving them.

How Does This Planning Save Time?

Planning your garden around preservation goals saves time in two powerful ways.

You avoid reactive preservation. Without a plan, preservation happens in crisis mode … suddenly drowning in zucchini, frantically searching for recipes, spending entire weekends canning because everything ripened at once. With planning, you know what’s coming and when, so preservation happens in manageable weekly sessions.

You reduce decision fatigue. Your preservation goals are set months in advance. When harvest arrives, you already know what you’re making and why. No standing in the kitchen wondering what to do with a basket of tomatoes that you planned for tomato sauce back in March.

Restaurant kitchens work this way. They know their menu, prep specific ingredients, and execute efficiently because decisions are made once, not daily. Your preservation-focused garden plan creates the same efficiency.

Creating Your First Preservation Garden Plan

Ready to plan next season’s garden with preservation in mind? Start here:

This season: Begin a harvest log. Track what grows, when, and how much. Notice what you actually eat and preserve versus what sounds good in theory.

Before next season: Choose three staples you want preserved for year-round eating. Calculate how much you need based on your eating patterns. Research or estimate how many plants you’ll need to grow.

Create your garden layout: Dedicate adequate space to your three preservation staples. Don’t let novelty varieties crowd out the crops that will actually feed you through winter.

This simple planning framework connects your garden to your table across all seasons. You’re no longer just growing food—you’re creating a year-round food system.

Want the complete planning framework? The masterclass walks you through the entire system for setting preservation goals, tracking your garden’s productivity, and creating future harvest plans that eliminate guesswork. You’ll learn how to link your garden planning to actual meals on your winter table, ensuring nothing goes to waste and your pantry stays stocked with foods you love. Register now to discover how experienced gardeners plan for abundance without overwhelm.

Register for the Preserving & Storing the Harvest” Masterclass Here

Free Masterclass

Learn The Easiest Ways To Preserve Your Garden Harvest

Plate of green beans on a butcher block countertop

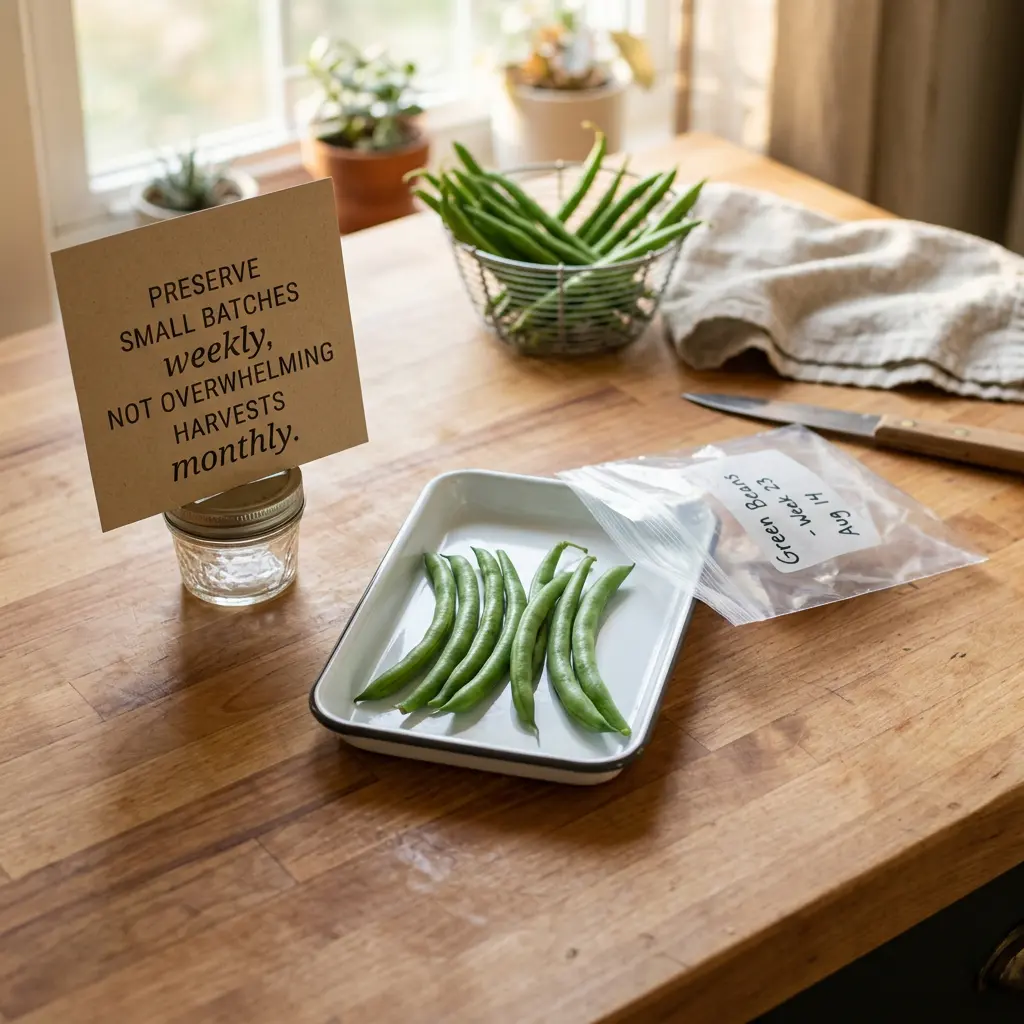
Quick Answer: The most effective way to preserve your garden harvest is to plan for preservation before you plant, choose 1-2 simple methods that fit your lifestyle (like freezing or dehydrating), and preserve small batches weekly rather than waiting for overwhelming harvests. Most vegetables can be preserved using basic equipment you already own.

If you’re growing vegetables, learning to preserve your harvest lets you enjoy homegrown food year-round. The challenge isn’t finding preservation methods—it’s integrating preservation into your garden rhythm so it feels manageable rather than overwhelming.

This guide covers the essential preservation methods home gardeners use most, how to choose which method works for each vegetable, and how to create simple systems that turn harvest abundance into winter meals.

Want the complete system? The masterclass reveals how experienced gardeners plan their gardens with preservation in mind from the start, ensuring they grow the right amounts and varieties while avoiding the harvest overwhelm most beginners face.


Register for the Preserving & Storing the Harvest” Masterclass Here

Why Plan Your Garden With Preservation in Mind?

Most gardeners think about preservation after their harvest arrives. But the most successful food gardeners plan preservation goals before planting their first seed.

Planning ahead helps you:

• Choose the right varieties: Paste tomatoes make better sauce than slicing tomatoes. Pickling cucumbers stay crunchier than standard varieties.
Grow appropriate quantities: If you want 20 jars of tomato sauce for winter, you’ll need approximately 30-40 paste tomato plants.
Space out harvests: Succession planting spreads preservation work across weeks instead of overwhelming weekends.
Store without processing: Winter squash, garlic, and onions cure naturally and store for months without freezing or canning.

Even a modest garden can provide meaningful year-round eating when you preserve intentionally.

What Are the Best Methods to Preserve Garden Vegetables?

Home gardeners rely on six main preservation methods. Each has advantages depending on the vegetable, your available storage space, and how you like to cook.

Freezing preserves flavor and nutrition quickly with minimal equipment. Most vegetables need blanching first (brief boiling followed by ice water) to deactivate enzymes that cause deterioration. Green beans, broccoli, and peppers freeze especially well and maintain quality for months. Freezing works best if you have adequate freezer space and cook with frozen ingredients regularly.

Dehydrating removes moisture to prevent spoilage while concentrating flavors. Tomatoes, peppers, herbs, and greens dehydrate beautifully and require minimal storage space. A basic dehydrator offers hands-off preservation—load trays, set the temperature, and return hours later. Dried foods rehydrate quickly in soups, stews, and sauces.

Canning creates shelf-stable jars that need no refrigeration or freezer space. It requires following tested recipes carefully for food safety, but the investment of time creates ready-to-eat meals you can pull from the pantry anytime. Tomatoes, pickles, and jams are excellent beginner canning projects.

Fermenting transforms vegetables like cabbage into probiotic-rich foods like sauerkraut and kimchi. The fermentation process takes 2-6 weeks but requires minimal active time. Fermented foods support gut health and add complex flavors to meals.

Quick pickling preserves vegetables in vinegar brine stored in the refrigerator. This fast method works beautifully for cucumbers, zucchini, and other summer vegetables. No special canning equipment needed—just clean jars and your refrigerator.

Curing and storing works for winter squash, onions, garlic, potatoes, and root vegetables. After curing (a process of drying in specific conditions), these crops store for months in cool, dark spaces without any processing.

How Do You Create a Preservation System That Actually Works?

Success with preservation comes from creating simple routines, not heroic marathon sessions. Here’s how to set up systems that feel manageable:

Preserve within 24 hours of harvest. Vegetables lose sugars and quality quickly after picking. Schedule preservation time before you harvest—if you can’t preserve until evening, harvest in the cool morning and refrigerate immediately.

Batch similar work together. Dedicate one session to blanching and freezing beans. Another afternoon for making tomato sauce. Focusing on one method and one vegetable creates rhythm and efficiency.

Store equipment accessibly. Keep canning jars, freezer bags, dehydrator trays, and labels where you can reach them easily. Convenient storage removes friction from the preservation process.

Start small and build gradually. Master one preservation method with one crop you love. Next season, add another. Within a few years, you’ll have diverse preservation skills and the confidence to handle whatever your garden produces.

How Do You Use Preserved Food Throughout the Year?

Successful preservation means more than filling jars and bags—it means actually using what you preserved. These organizing strategies help:

Label completely. Include what you preserved, the date, and when it should be used by. Detailed labels help with meal planning and prevent food waste.

Organize by use. Group ingredients by how you cook—soup vegetables together, stir-fry ingredients in one section. This makes pulling together meals intuitive.

Track your inventory. Keep a simple list of what you preserved and check items off as you use them. This helps you refine next year’s garden based on what you actually enjoyed eating.

The real reward of preservation comes when you’re cooking on a February evening, pulling out ingredients you grew in July, connecting your winter table to your summer garden.

Getting Started With Garden Preservation

You don’t need to master every preservation method immediately. Choose one technique that appeals to you and one crop you love growing. Build your skills gradually through practice.

Each season, add another crop or try a new method. Within a few years, you’ll develop preservation instincts—knowing what to plant, when to harvest, and how to preserve it efficiently.

The gardeners who successfully preserve their harvests don’t have more time or better equipment. They have systems that integrate preservation into their garden rhythm from planning through harvest.

Plate of green beans on a butcher block countertop

Ready to build your preservation system? The masterclass walks through the complete framework for planning your garden with preservation goals, choosing methods that fit your lifestyle, and creating weekly rhythms that keep you ahead of your harvest. Register now to discover how experienced gardeners make preservation feel effortless rather than overwhelming.


Register for the Preserving & Storing the Harvest” Masterclass Here

Indoor Seed Starting Made Simple

Starting seeds indoors is one of the most rewarding ways to kick off your gardening season. Not only does it give you a head start, but it also allows you to grow a wide variety of plants that may not thrive outside in your region until later in the year. However, indoor seed starting requires attention to detail and the right setup to ensure success. If you’re new to starting seeds or want to improve your technique, this blog will guide you through the three essential keys to growing strong, healthy seedlings indoors.

1) Providing Adequate Light

One of the most important factors in successful indoor seed starting is light. Without the right lighting conditions, your seedlings will struggle to grow strong and healthy, becoming leggy and weak.

Why light is essential:
Seedlings need plenty of light to develop sturdy stems and leaves. While natural sunlight can be sufficient, it’s often not enough, especially in winter months when days are shorter. Most indoor spaces don’t get enough light to encourage optimal seedling growth.

Solution:
Invest in grow lights to ensure your seedlings get the proper amount of light. Choose full-spectrum LED or fluorescent lights that mimic natural sunlight. Place the lights 2-4 inches above your seedlings and leave them on for 12-16 hours a day. You can use timers to make sure your plants are getting consistent light each day.

2) Maintaining Proper Moisture

Watering your seeds and seedlings is another crucial factor for success. Too little water can cause them to dry out and die, while too much water can lead to root rot and other issues.

Why moisture matters:
Seedlings need consistent moisture to sprout and grow. The soil should stay moist but not soggy, as this balance encourages healthy root development. Additionally, indoor conditions can dry out quickly due to low humidity or heating systems, which can affect the moisture levels in your seed trays.

Solution:
Use a gentle mist or spray bottle to water your seeds initially. Once the seedlings begin to grow, you can water them more regularly using a small watering can or a tray-bottom watering system. To prevent overwatering, ensure your seed trays have proper drainage, and always allow the soil to dry out slightly before watering again. You can also use a humidity dome or clear plastic cover over your trays to retain moisture, but remember to remove it once the seeds have sprouted to prevent mold growth.

3) Choosing the Right Containers and Soil

The containers and soil you use for starting seeds can make a huge difference in your seedling success. Using the right materials will promote strong root growth, better moisture retention, and ultimately, healthier plants.

Why containers and soil matter:
Seeds need room to spread their roots, and the soil should be light and well-draining to allow air to circulate. If you use a heavy, compact soil mix, your seedlings may not have enough oxygen for proper root development, which can stunt their growth. Similarly, the wrong containers can restrict root growth, leading to weak plants.

Solution:
Choose seed starting trays with drainage holes to prevent water from accumulating at the bottom. You can also use individual pots or biodegradable seed pods for more space and easier transplanting. For soil, opt for a lightweight seed starting mix, which is formulated to provide good drainage while retaining moisture. Avoid using regular garden soil, as it can be too dense for seedlings and may contain harmful pathogens.

Starting seeds indoors doesn’t need to be complicated — it simply requires the right conditions. When seedlings receive steady light, balanced moisture, and a supportive growing mix, they naturally grow strong and resilient.

With this simple foundation in place, you can begin your garden season with confidence, knowing your plants are off to the healthiest possible start.